


Step 1: Create the Event in Your Calendar
Getting started is a simple two-step process in your own calendar.
1. Create the Event: Open your Google or Outlook calendar and create a new event just as you normally would. Be sure to include all the important details you want customers to see, such as the date, time, location, a descriptive message in the body, and any Google or Outlook Meet details.
2. Send the Invite: Once the event is ready, send the calendar invitation to a single, specific email address provided by the service (for example, create@calendarsnack.com).
This one action triggers the entire automated process.
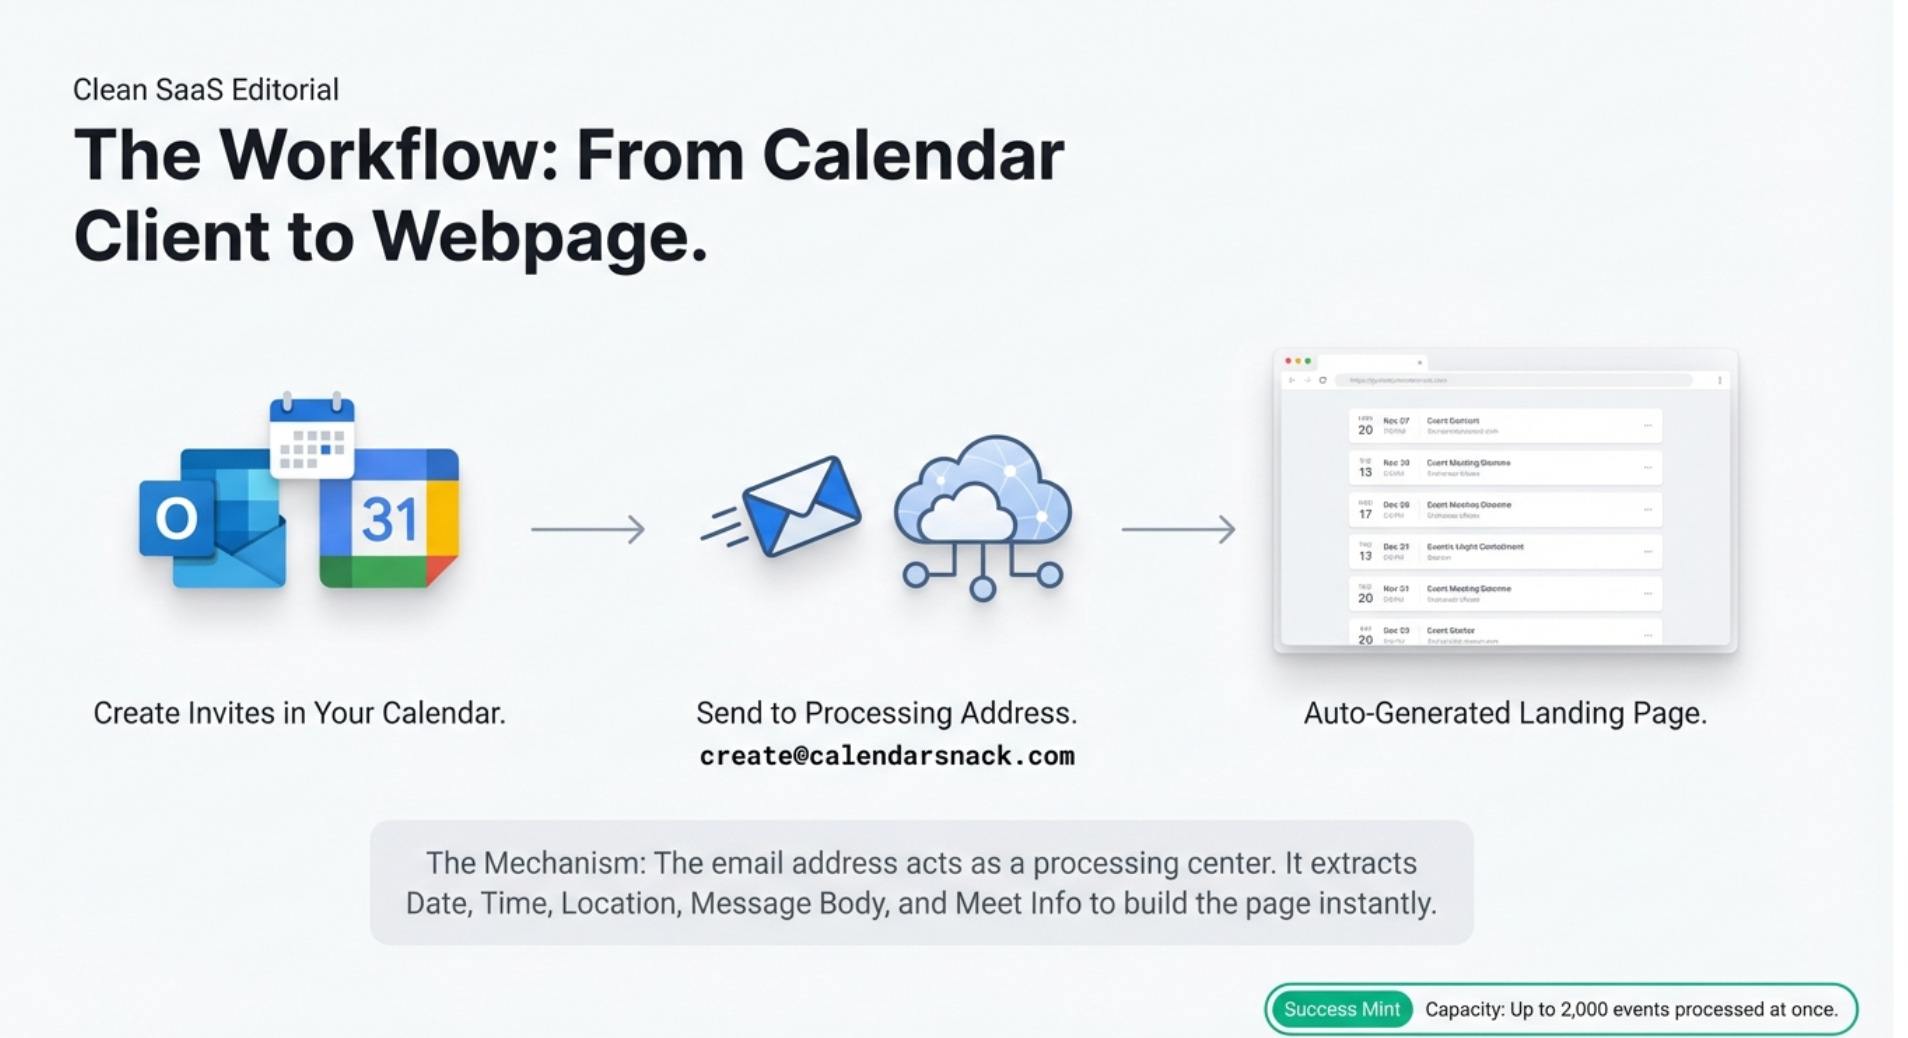
Step 2: Receive Your Automated Event Page
Immediately after you send the calendar invite, the system gets to work. Within 60 seconds, you will receive an email notification containing two critical links:
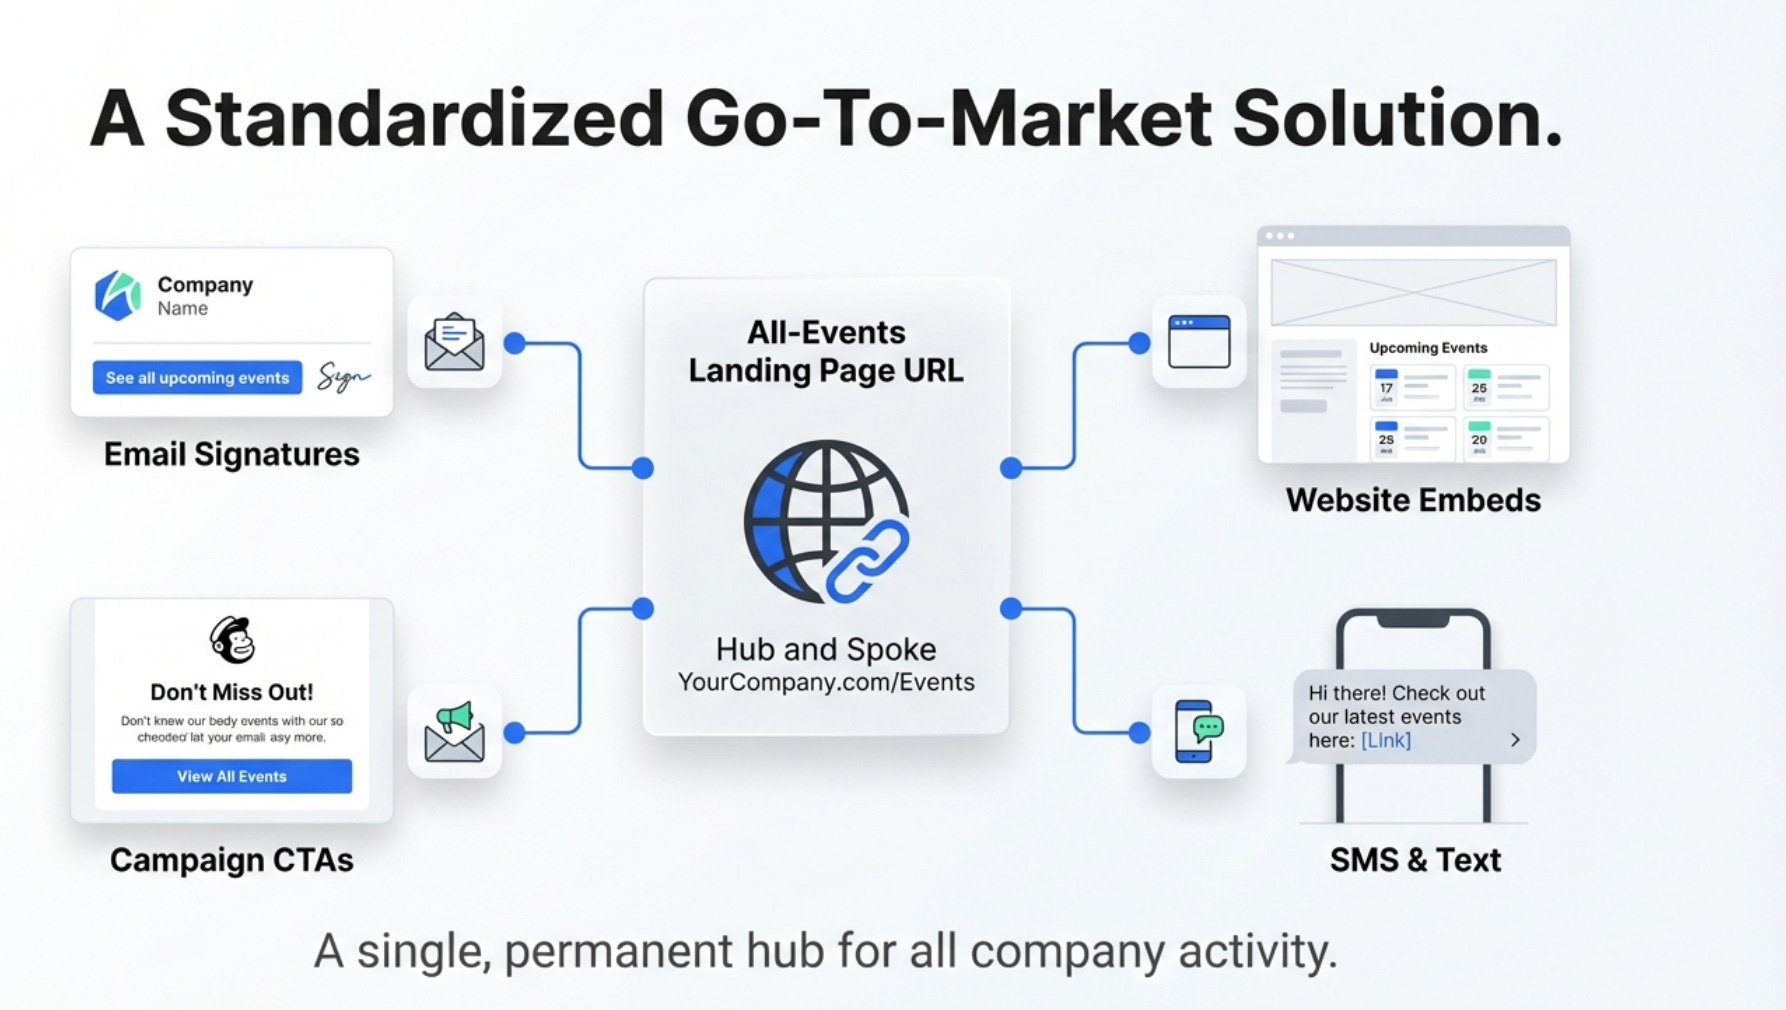
• The Shareable Event Page URL: This is the public-facing landing page where all of your future events are automatically displayed in chronological order. Customers can visit this single URL to see everything you have scheduled.
• The Private Reporting Page URL: This is your private dashboard. Here, you can track customer engagement and view detailed analytics for every event you create.
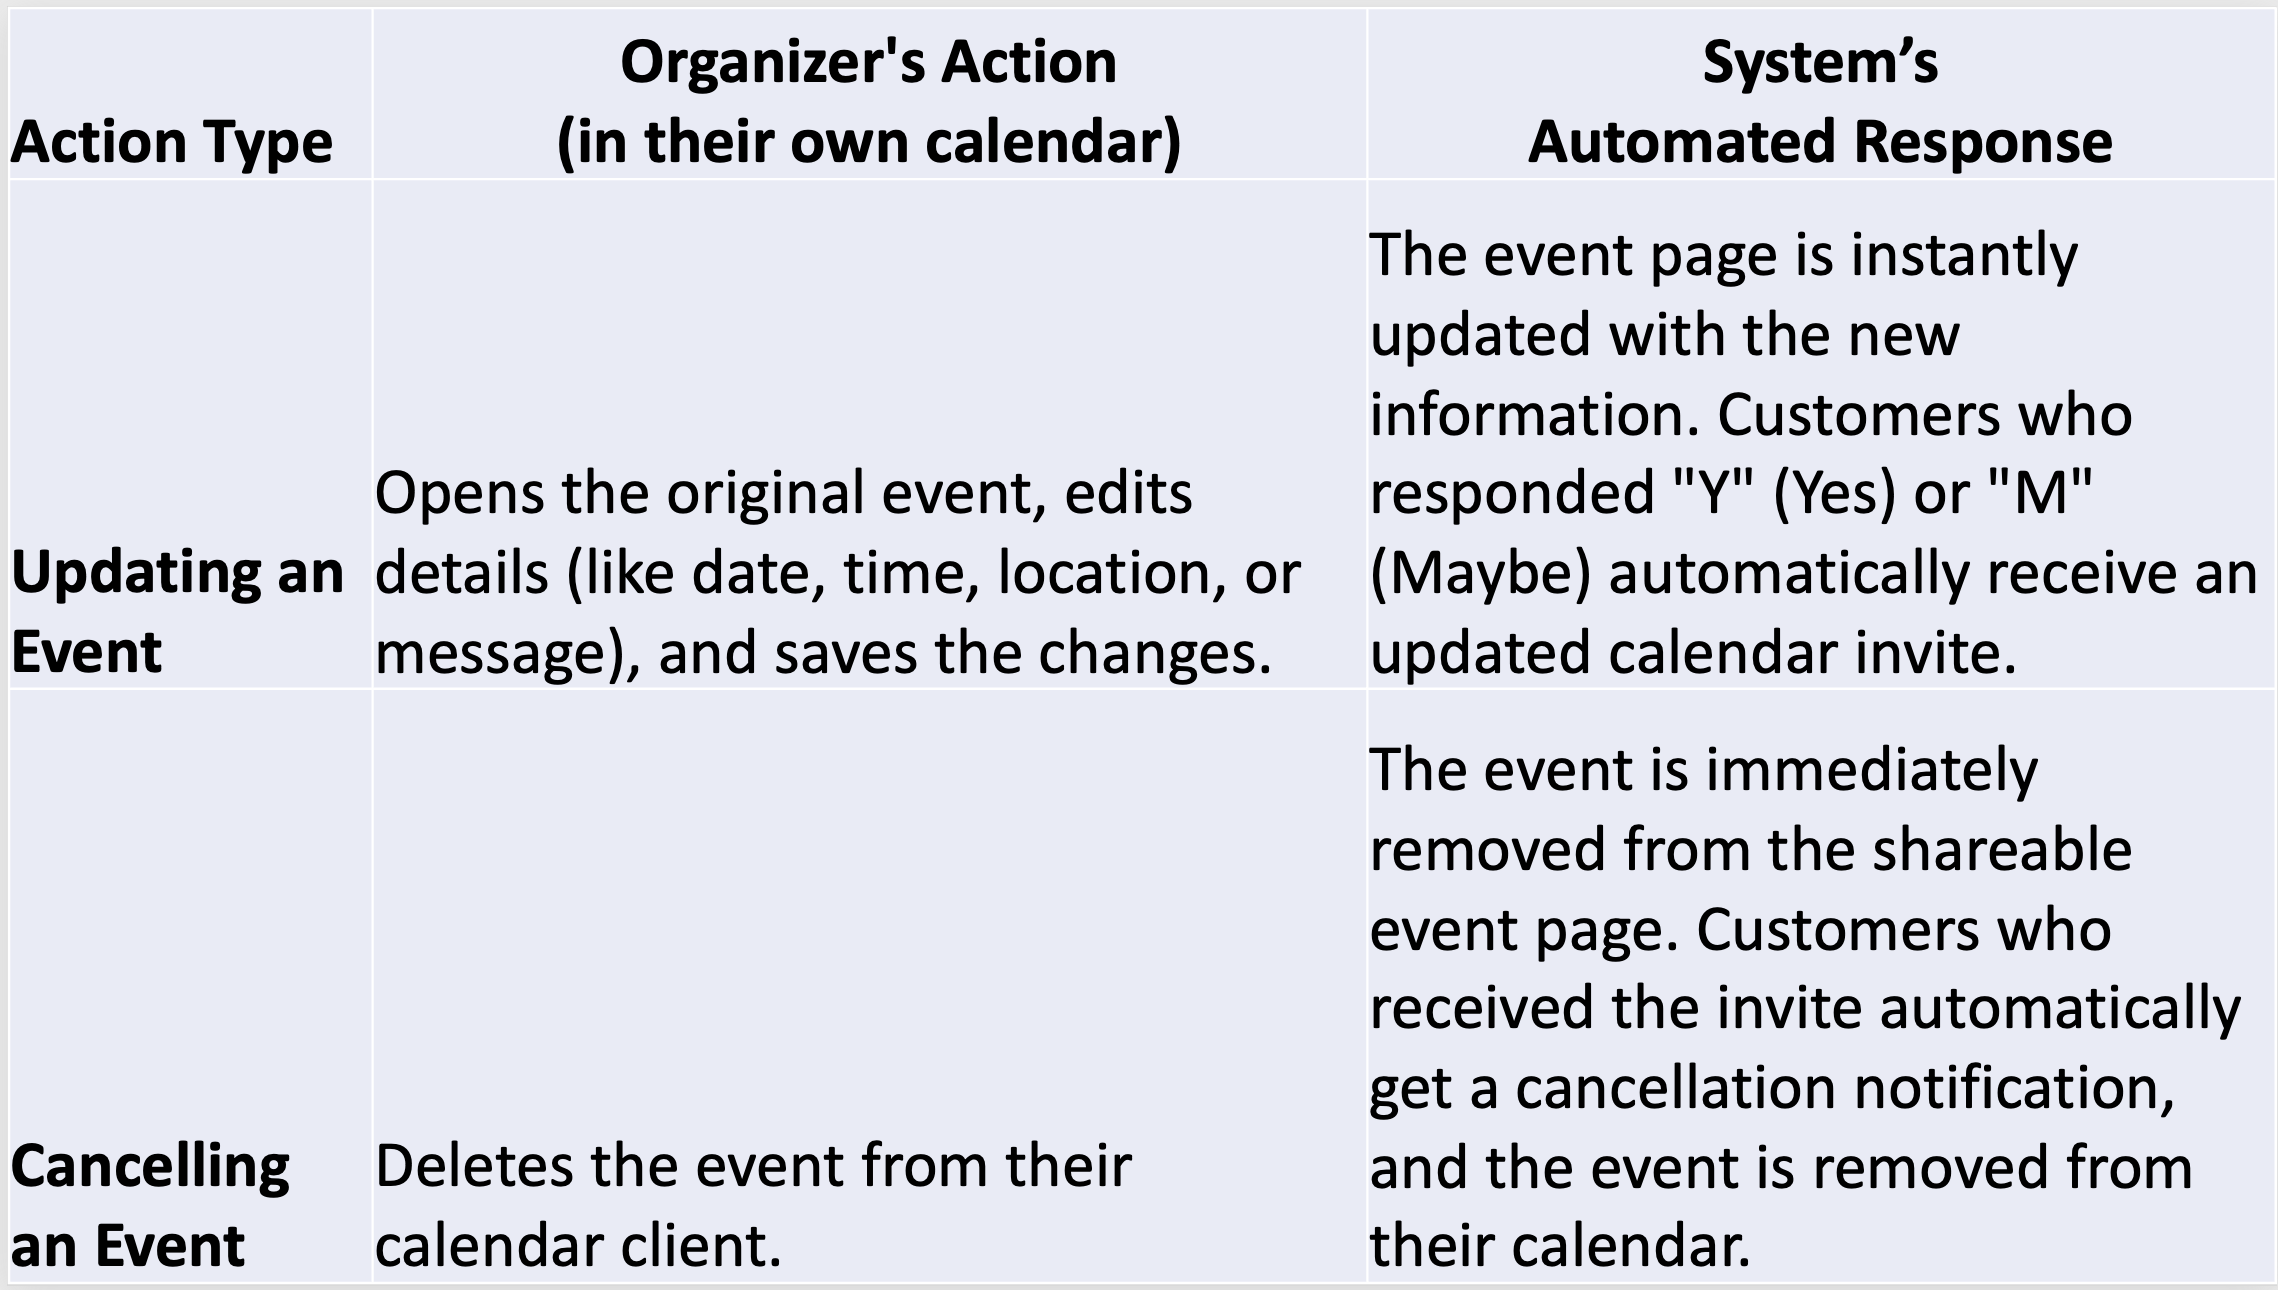
Step 3: Manage Your Events with Ease
Managing your events is as simple as creating them. All updates and cancellations are handled directly from your personal calendar, and the system automatically communicates those changes to your customers.
Step 4: Track Your Success with Analytics
The private reporting page provides valuable insights into how your events are performing. You can move beyond simple headcounts and understand customer behavior.
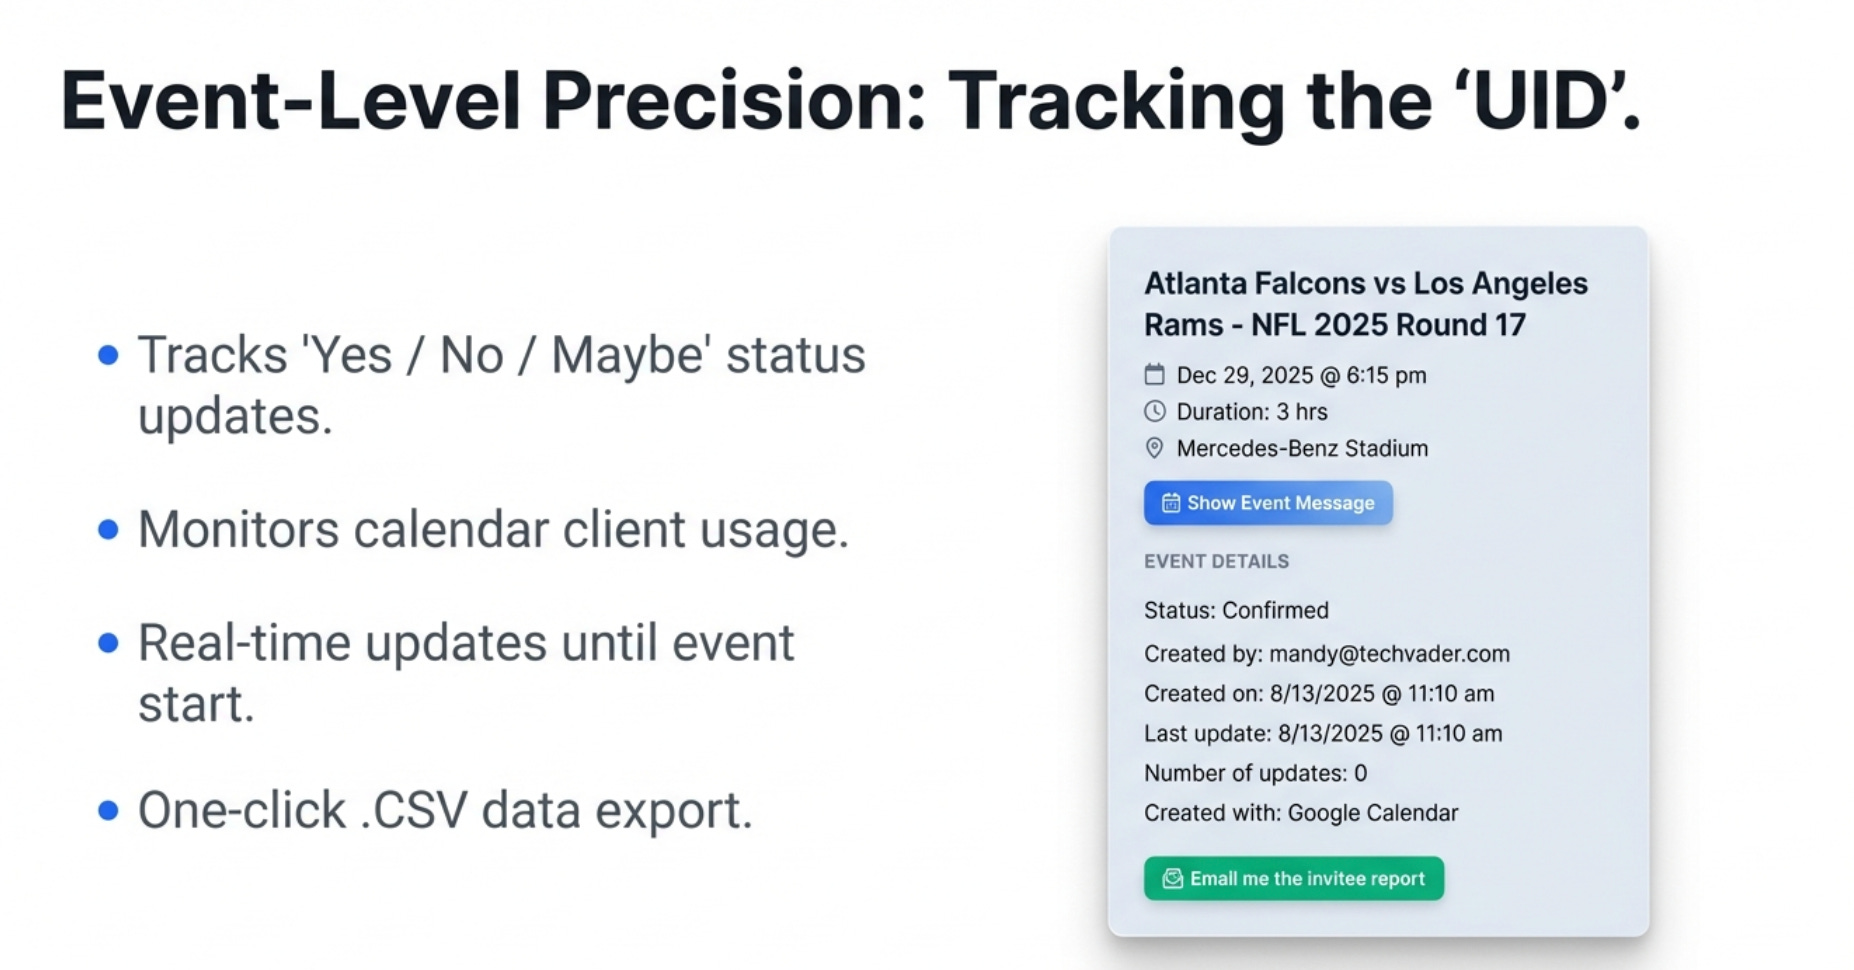
• RSVP Performance: Track customer responses for each event, seeing a clear breakdown of who responded Yes, No, or Maybe.
• Engagement Data: See precisely when customers clicked your calendar invite, which calendar client (e.g., Google, Outlook) they used, and which specific RSVP button (Yes, No, or Maybe) they clicked.
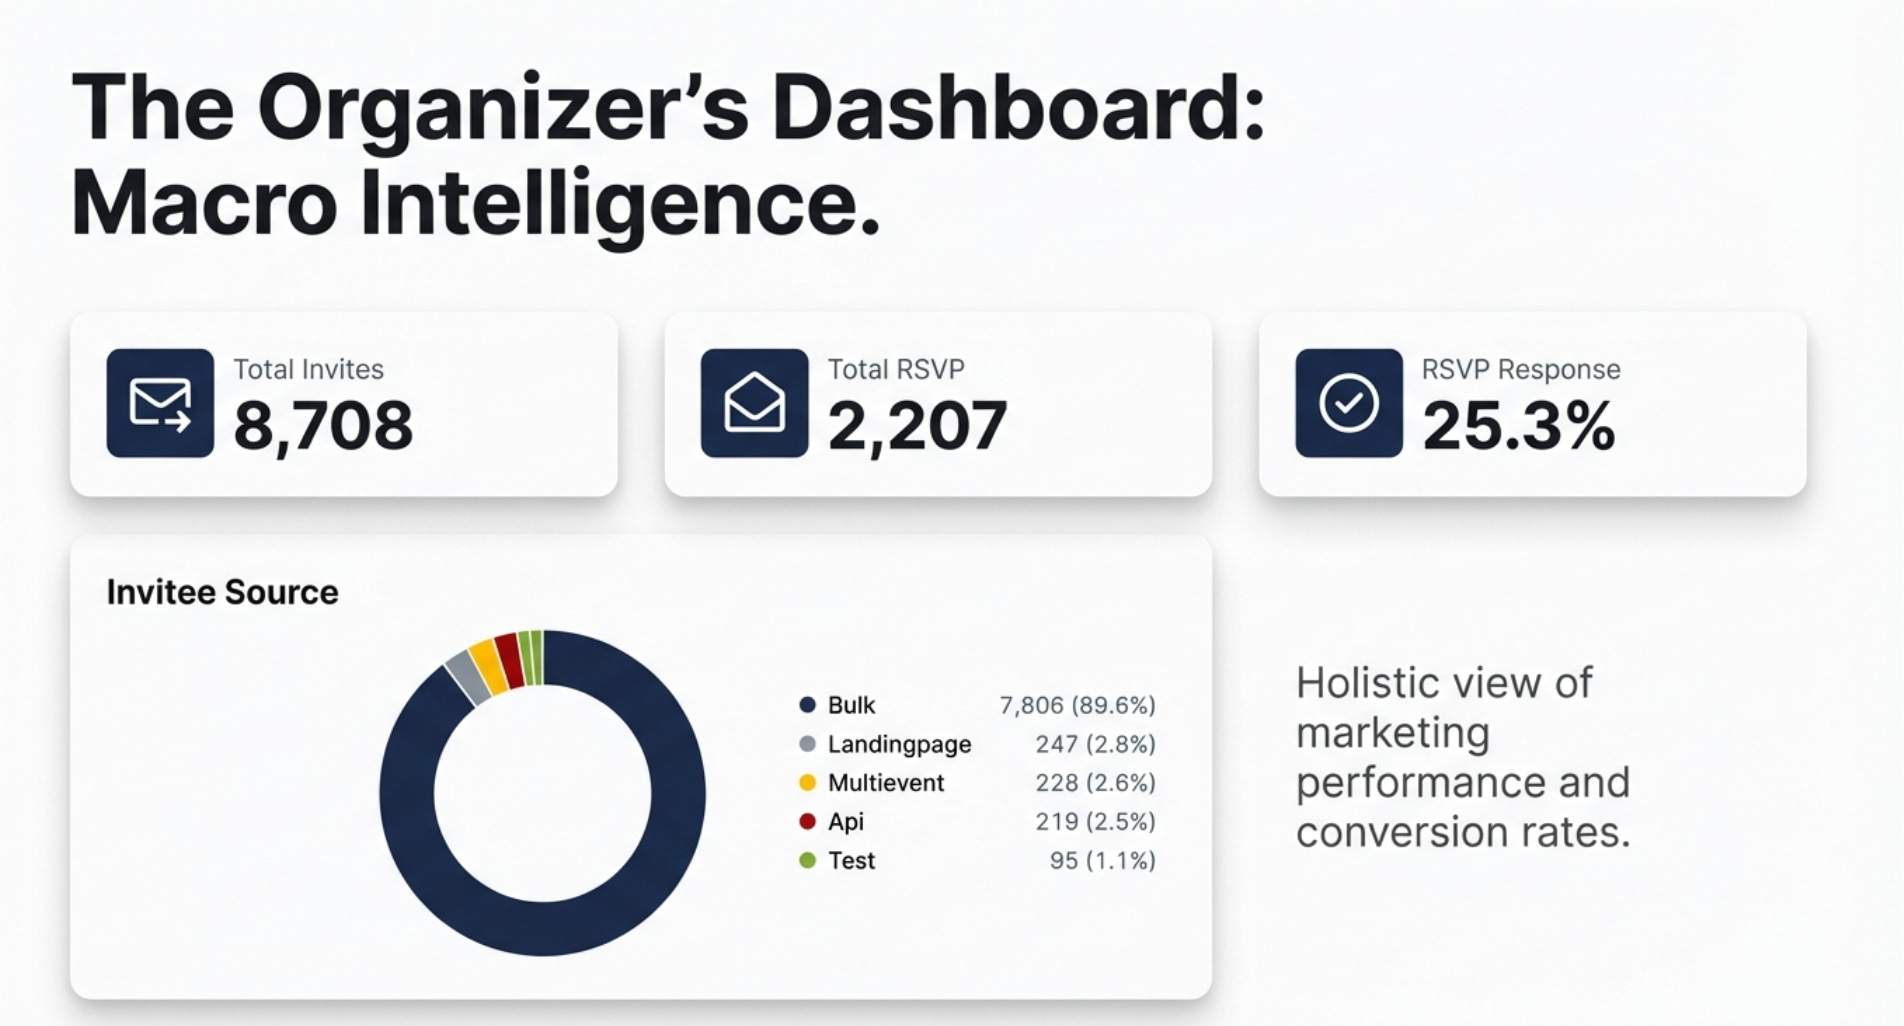
• Real-Time RSVP Tracking: Monitor customer sentiment as it changes. If a customer updates their status from Yes to Maybe, or from Maybe to No, that information is updated live on your reporting page right up until the event starts.
• Customer Lists: Get a list of customer email signups in a downloadable CSV format, perfect for follow-up communication or future marketing efforts.
Now that we’ve seen how you set everything up, let’s look at the simple, seamless customer experience.
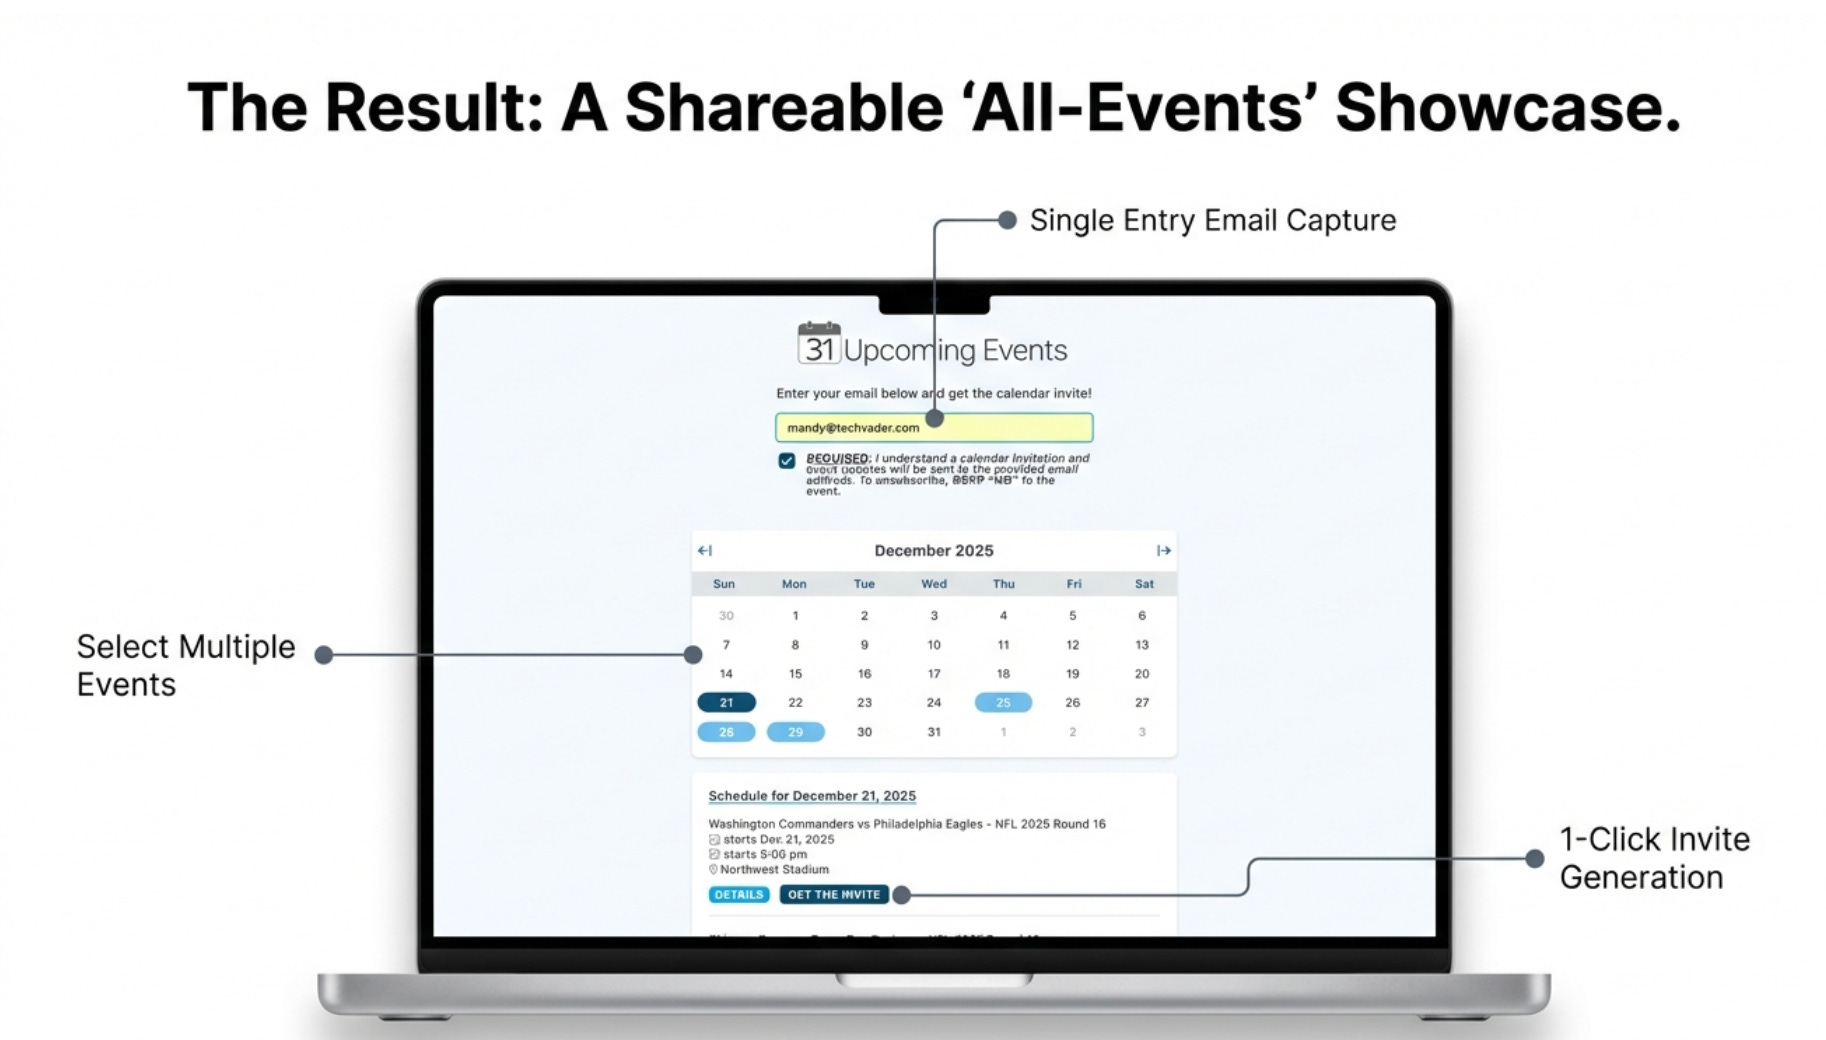
2. The Customer’s Experience: A Simple Path to Your Event
The process is designed to be completely effortless for the customer, allowing them to get event invitations with just a few clicks.
2.1. Finding and Getting a Calendar Invite
Here is the simple journey a customer takes to sign up for an event:
1. Visit the Page: The customer clicks a link to the organizer’s shareable “All-Events” landing page.
2. Enter Email: At the top of the page, the customer enters their email address into the prominent email box.
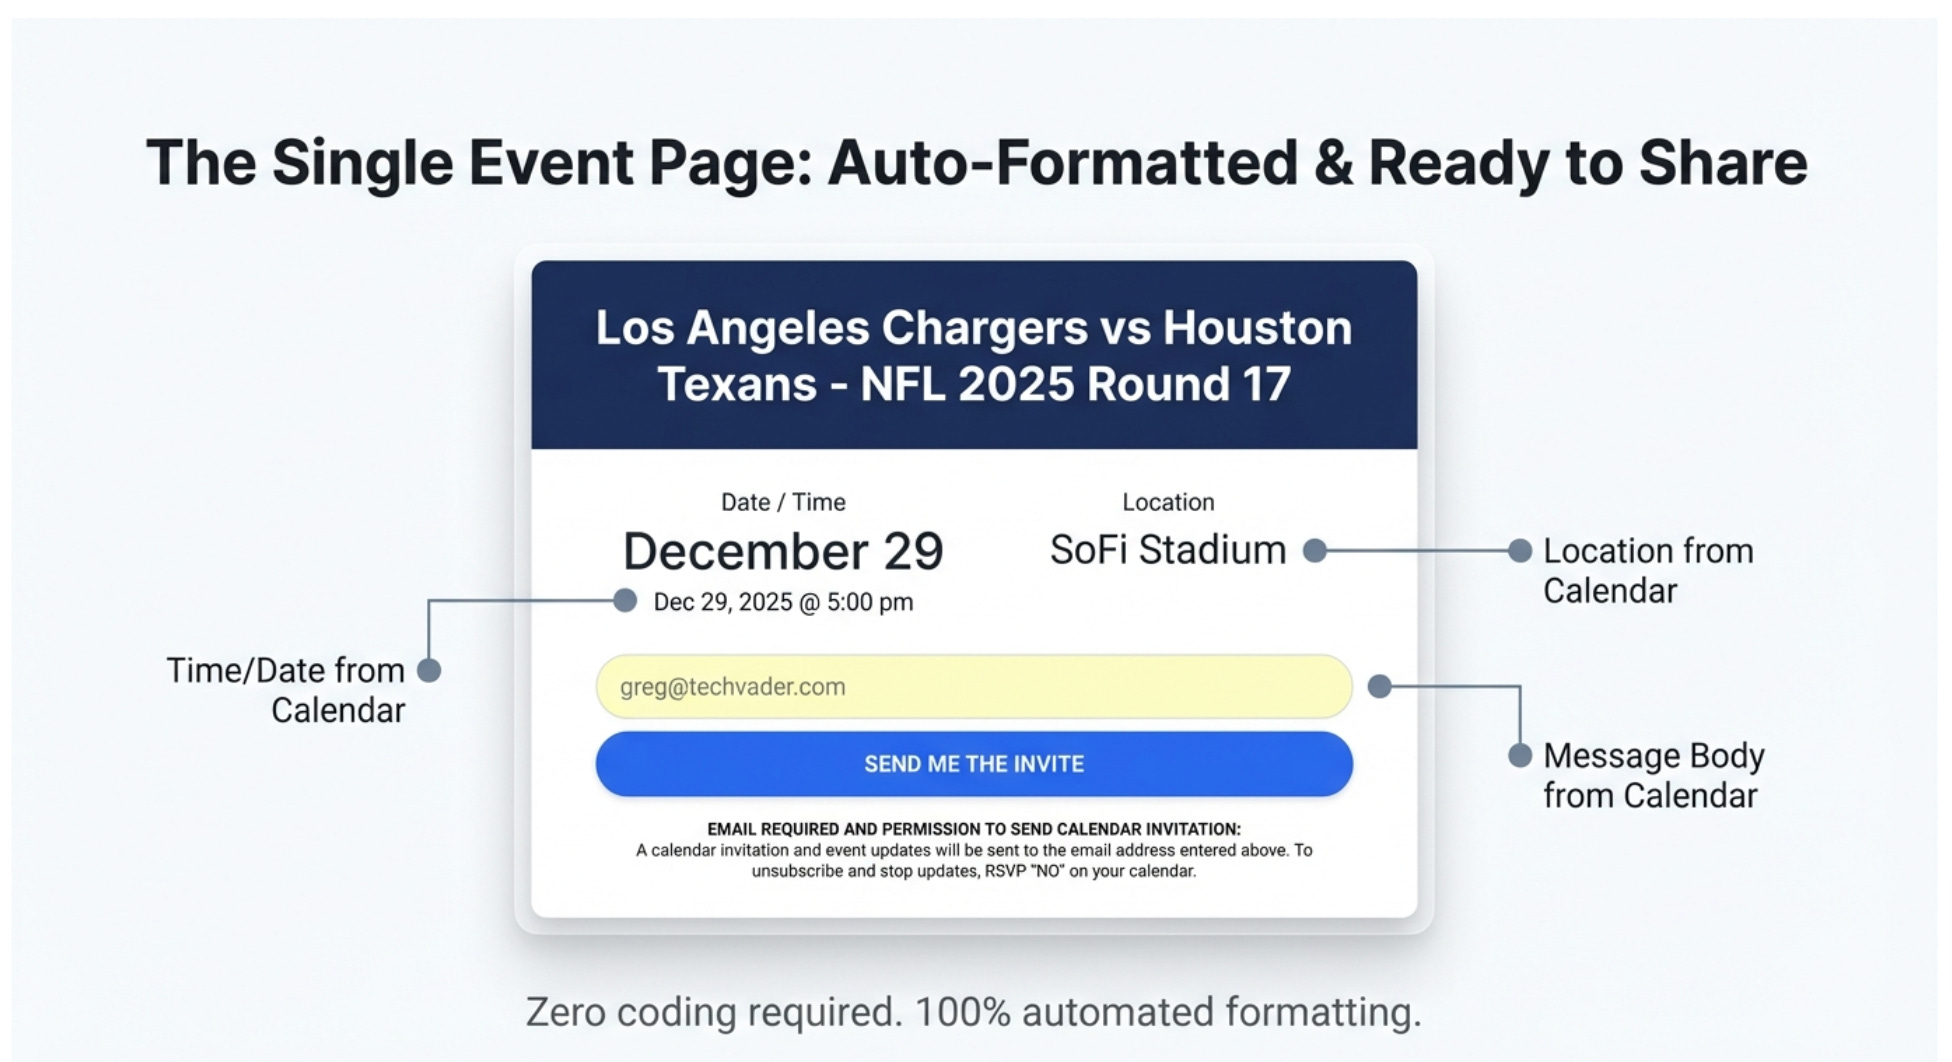
3. Select an Event: The customer browses the chronologically listed events and clicks the “Send Invite” or “Get The Invite” button (button text may vary) for any event or events they wish to attend.
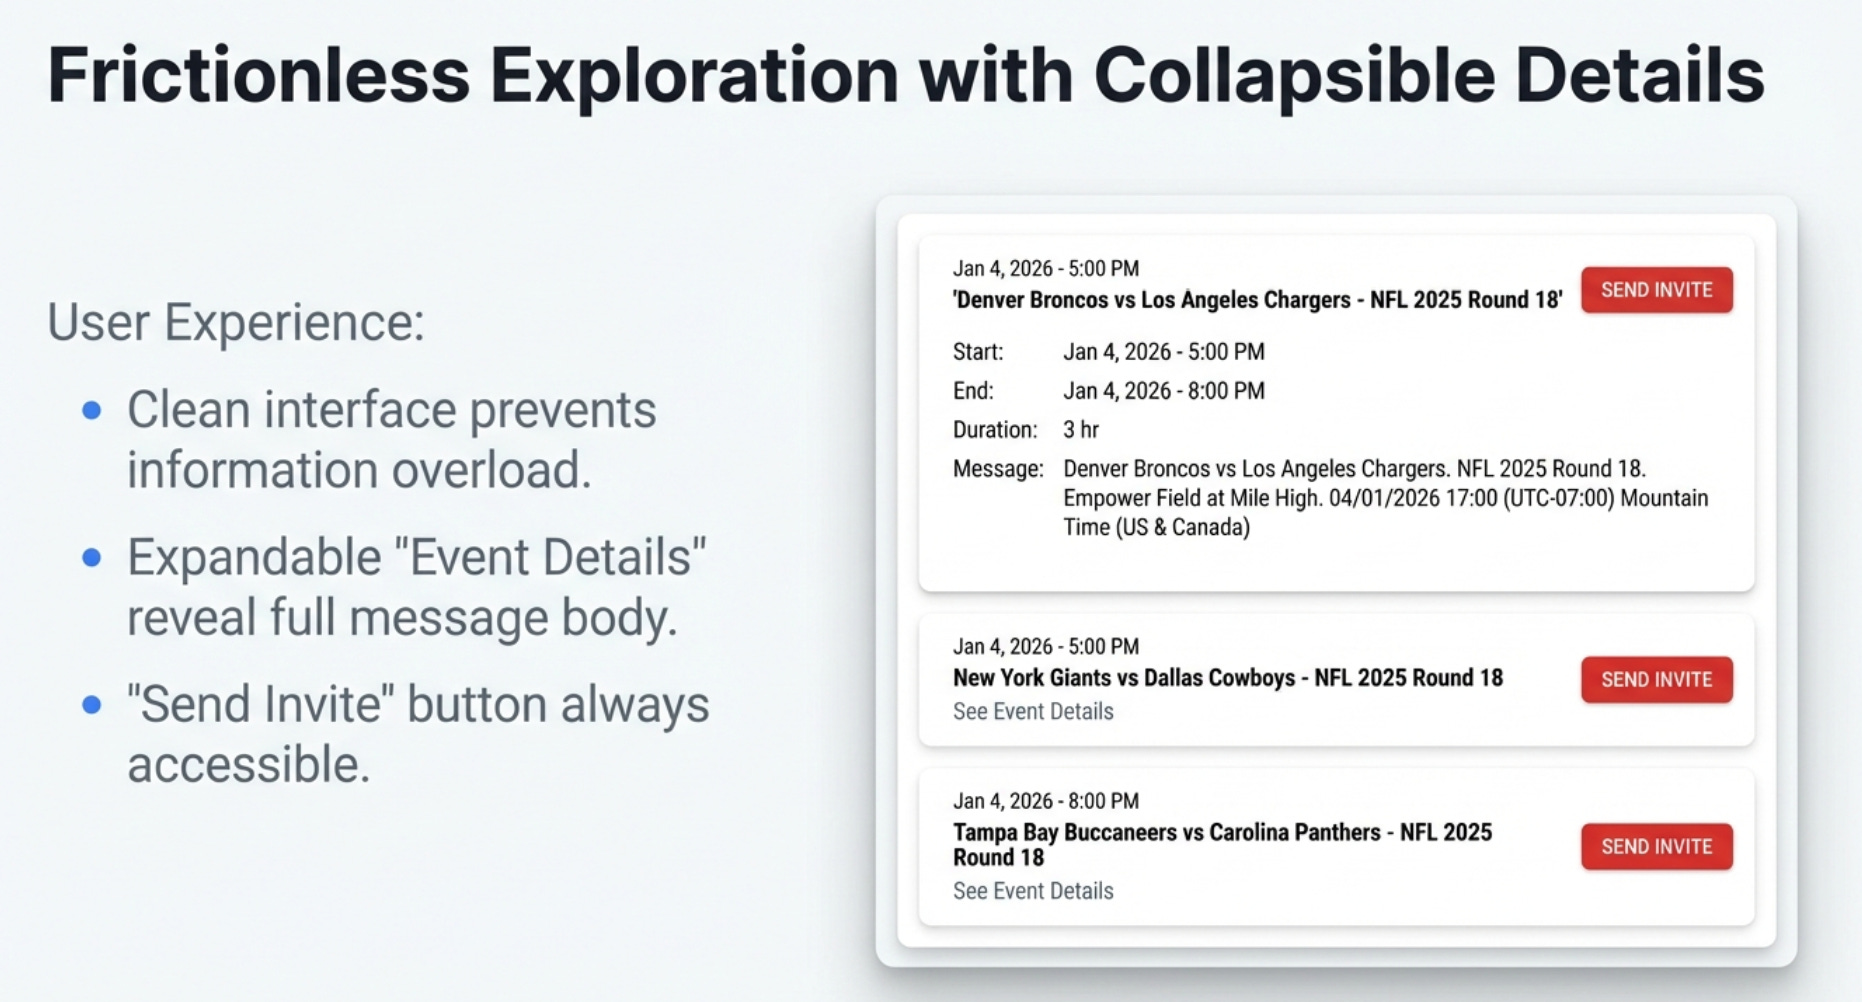
4. Receive Invite: A calendar invitation for the selected event(s) is sent directly to their email inbox and appears on their personal calendar.
2.2. Staying Informed Automatically
The primary benefit for the customer is peace of mind. Once a customer receives a calendar invite for an event, they are automatically kept in the loop. They never have to worry about missing a change or checking back for updates.
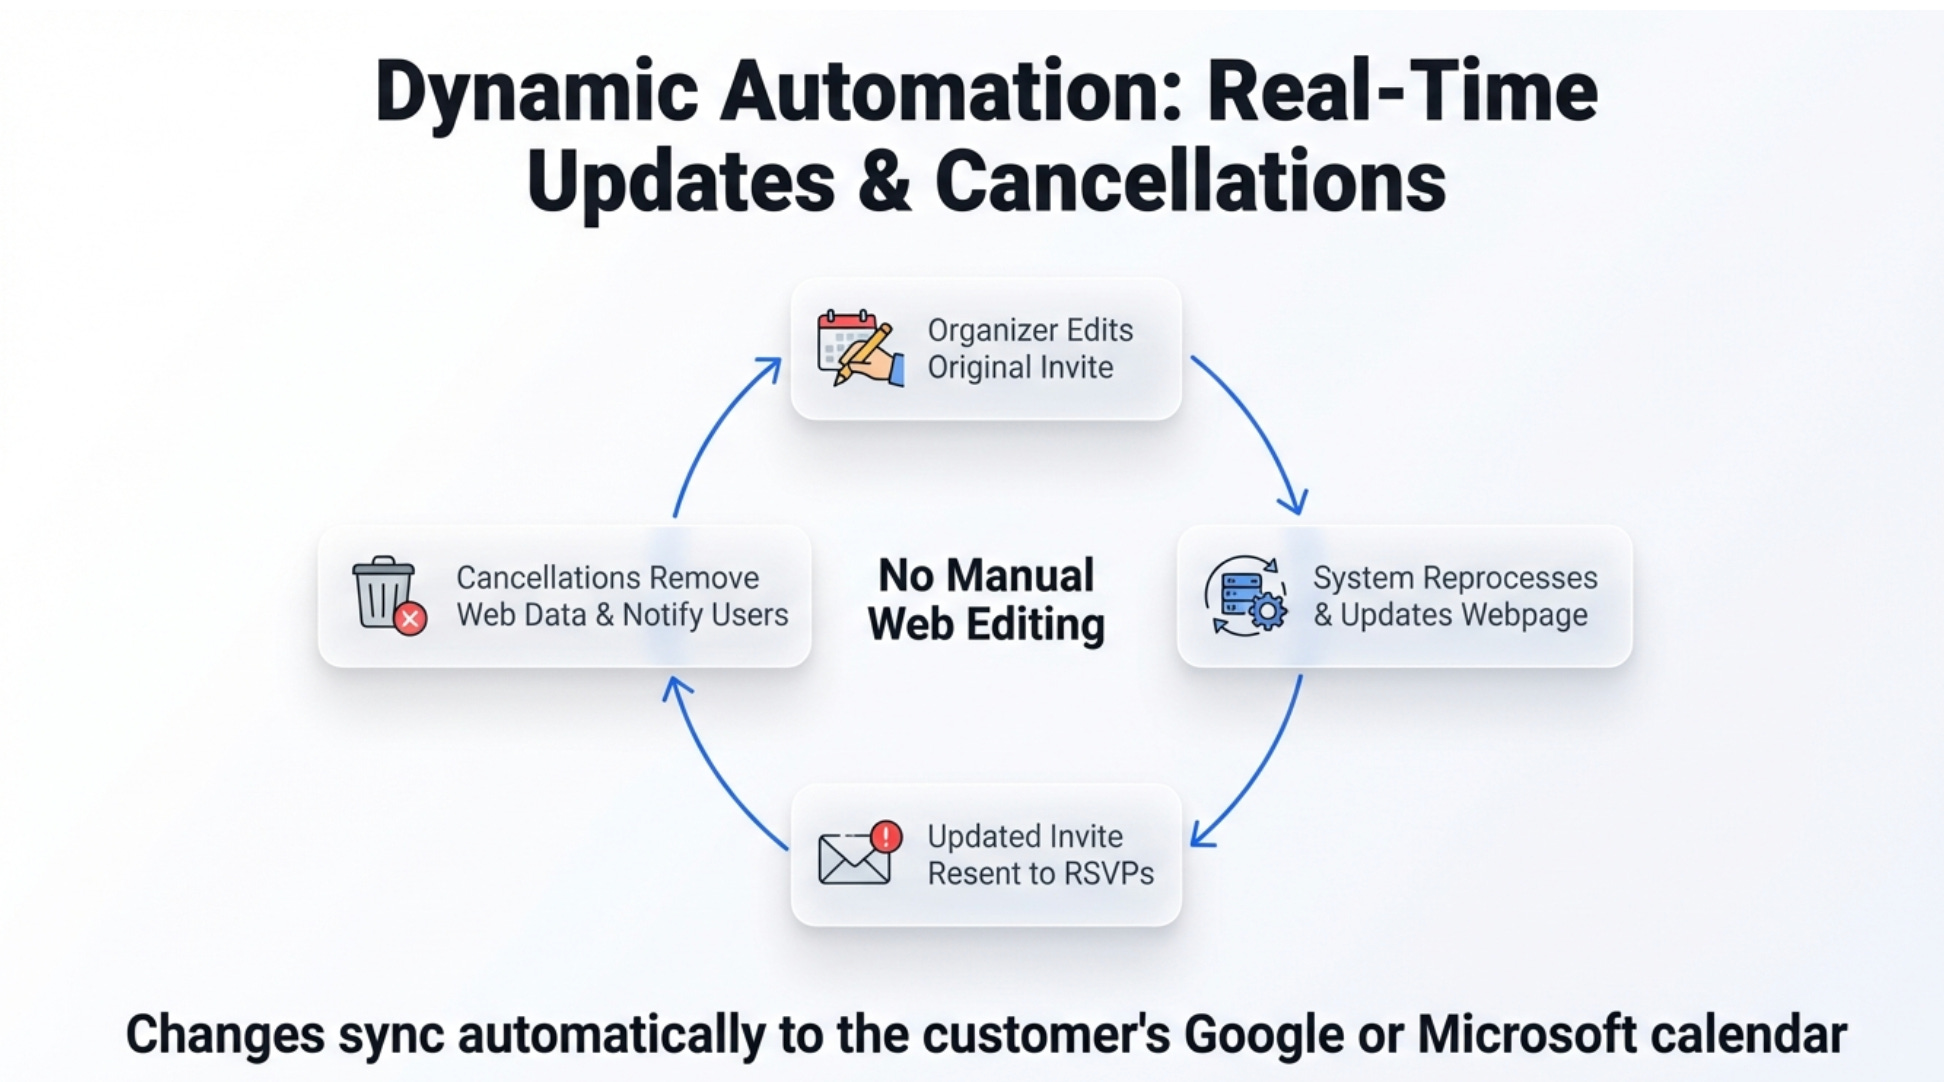
Any modifications from the organizer—whether it’s a new time, a different location, or a complete cancellation—are automatically sent to their calendar, ensuring they always have the most current information.
This streamlined process for both parties leads to several key benefits.
3. The Big Picture: Key Benefits Summarized
For the Organizer
• Use Existing Tools: There is no new software to learn. You can create and manage all events entirely from your existing Google or Outlook calendar.
• Automated Marketing: The system instantly generates a professional, shareable landing page that can be used in employee email signatures, on company websites, or as a call-to-action (CTA) button in email campaigns.
• Actionable Insights: You gain valuable, real-time data on event performance and customer engagement through a private, easy-to-understand reporting dashboard.
• Guaranteed Delivery: You can be confident that calendar invites go directly to the customer’s email and calendar, as the customer provides their correct email address themselves.
• Organic Reach: The all-events page is easily shareable by customers via email or SMS, allowing for viral marketing and broader reach at no extra cost.
For the Customer
• Multi-Event Simplicity: After entering an email address once, you can request invites for one or multiple events in a single session with just one click per event.

• Effortless Updates: You automatically receive calendar updates and cancellations directly, ensuring you always have the latest event information without any extra work.
• Clear and Simple Interface: You can easily browse and select events from a clean, straightforward landing page.
