
The Embedded Calendar Invite
Traditional registration workflows demand that a user navigate through a browser redirect, land on a registration page, and manually input their name, email address and click a button to get an event confirmation email with an Add to Calendar Button.
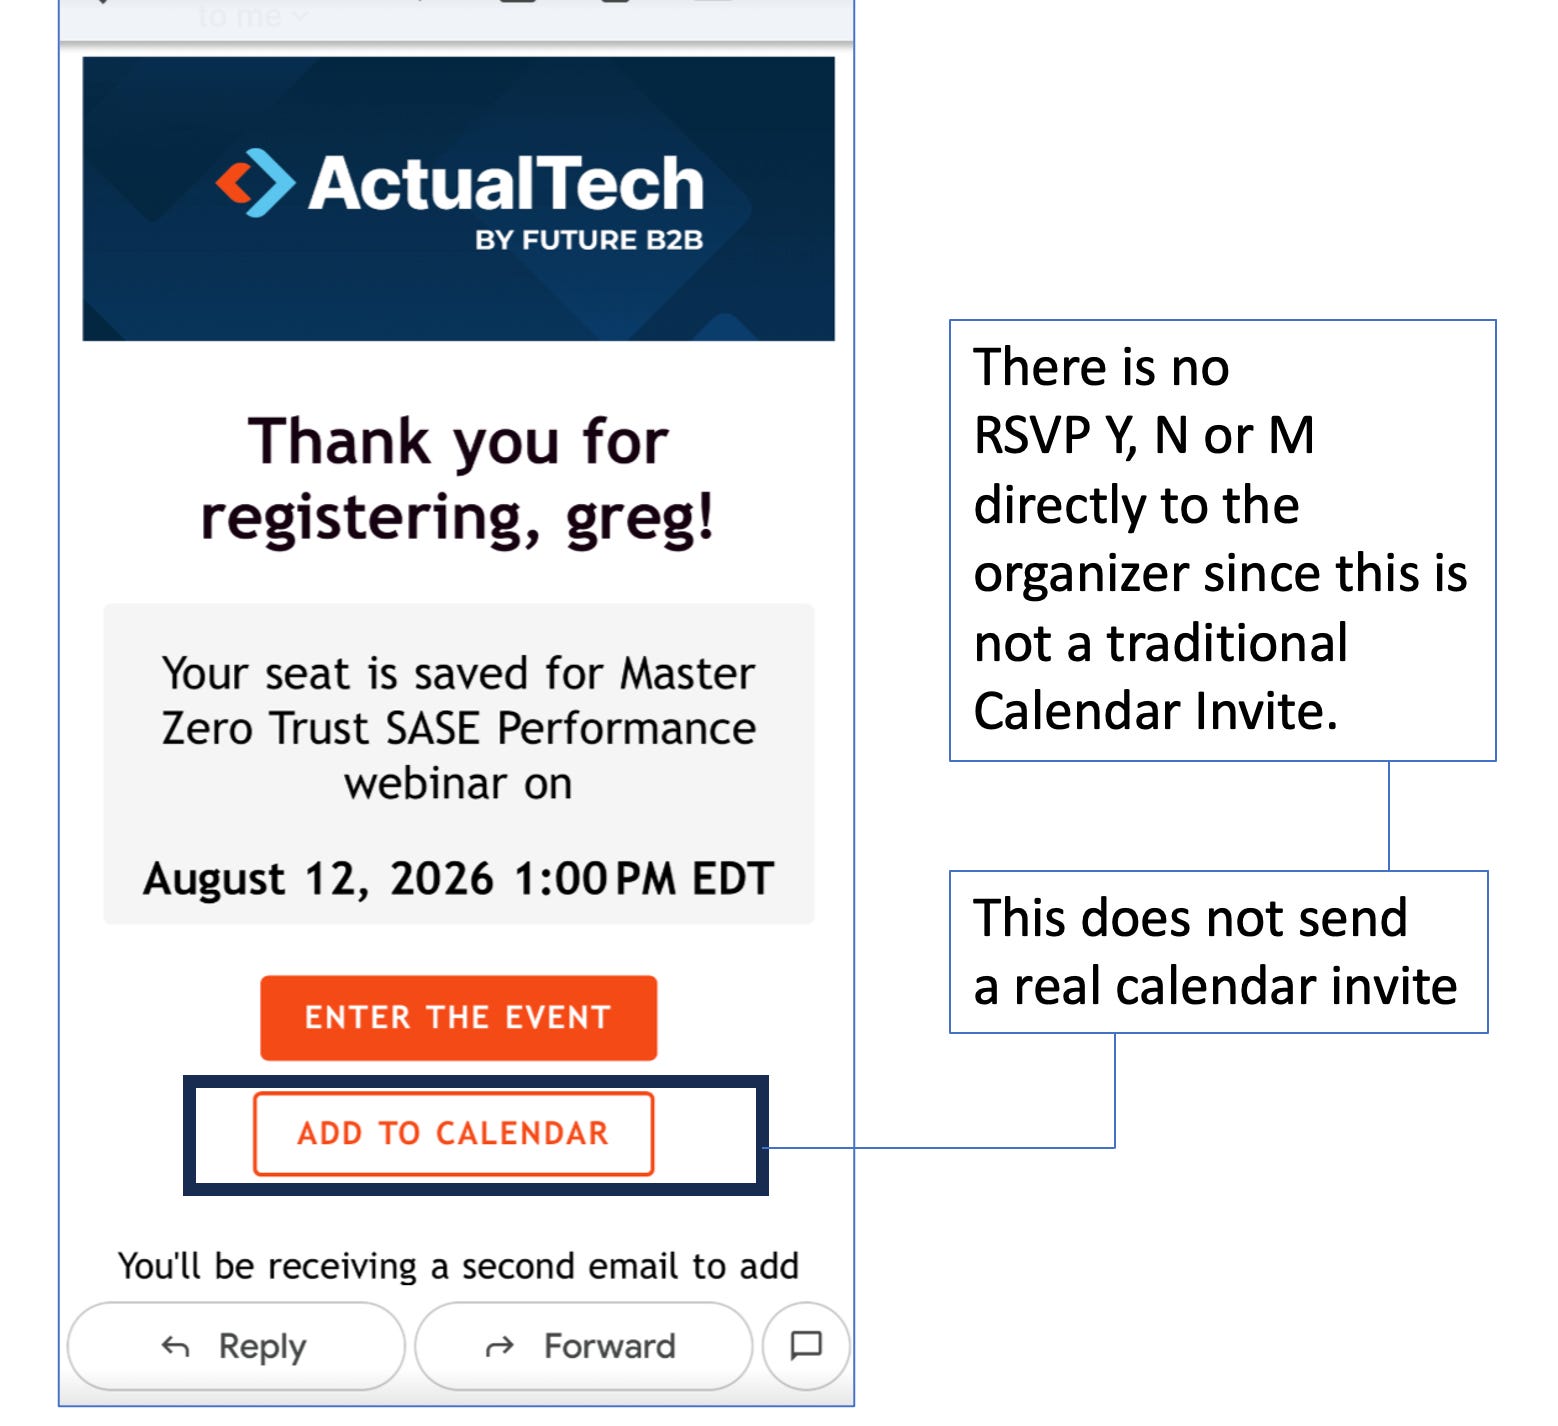
The Add to Calendar event may or may not appear on the customer’s calendar, and the organizer has no way to track whether customers received it (Y/N/M).
You will not know as a marketer.
This forces the organizer to send 2 to 4 more emails to “REMIND” a customer about the event because they aren't actually collecting RSVPs from the “ADD to CALENDAR” Button.
This happens millions of times a day on the Internet.
We have fixed this problem with the embedded calendar invite code generator.
Why the 1 Click Calendar Invite Button is Better
The MailChimp Code is a “magic” API trigger that bypasses the browser entirely and sends a calendar invite when the CTA Button is clicked in the Email Template.
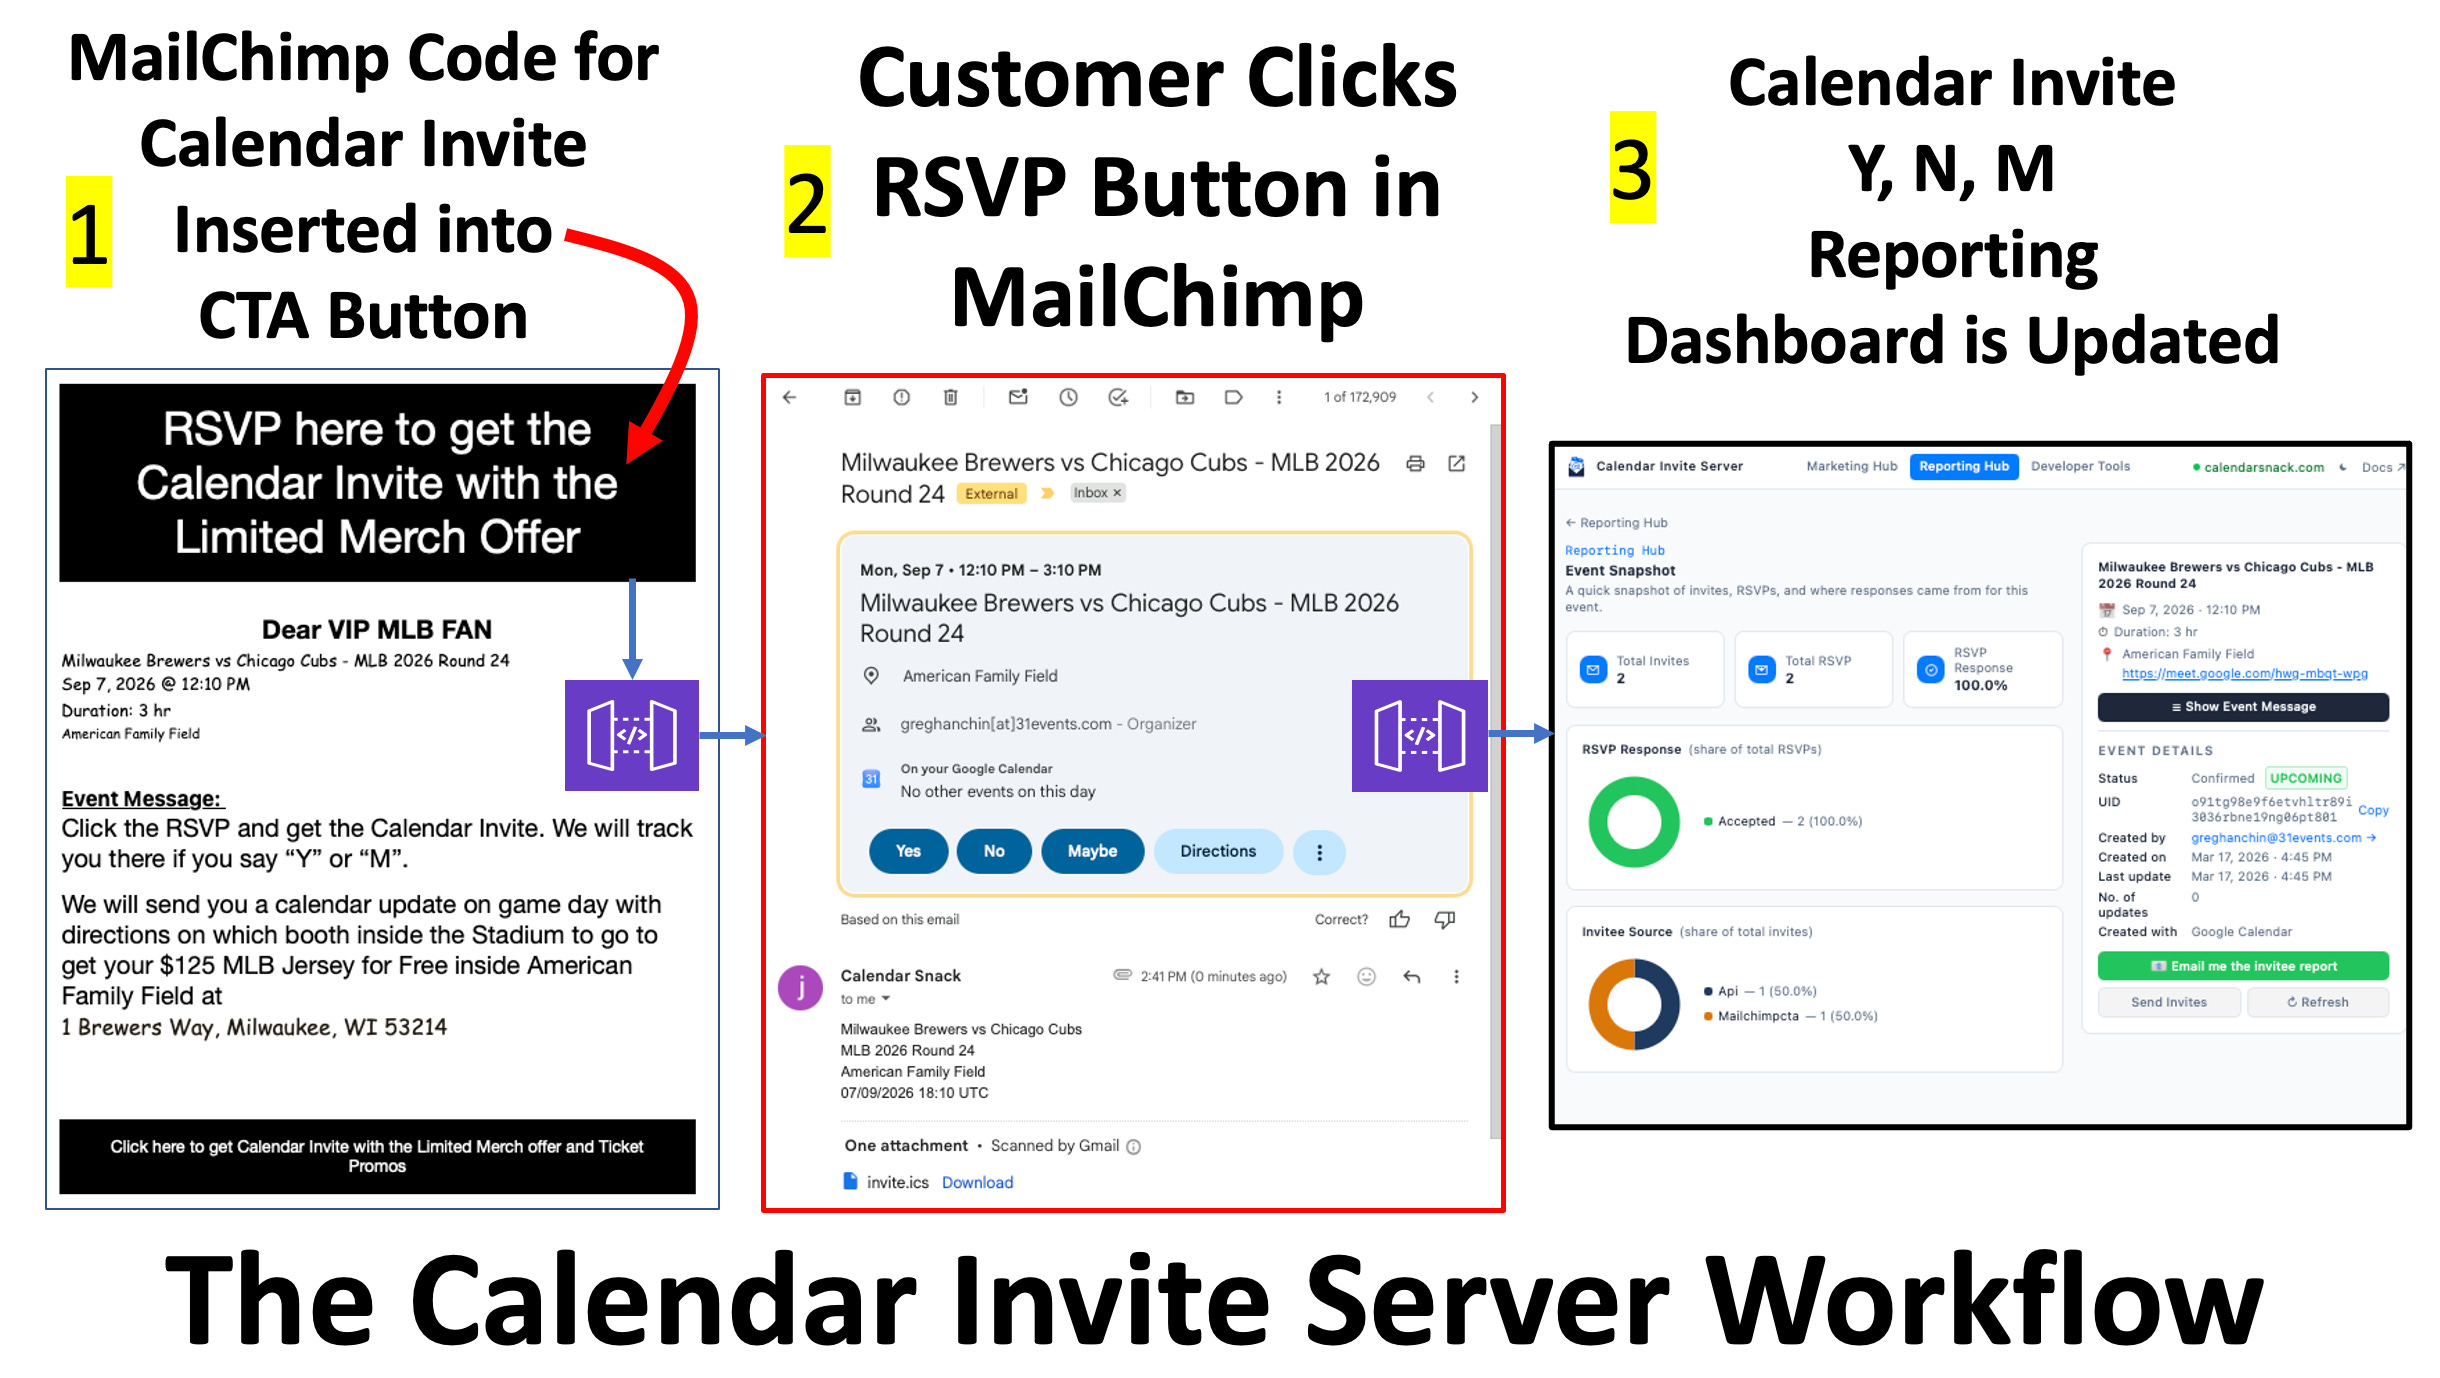
The embed code is designed to be inserted directly into a Mailchimp Call to Action (CTA) button. When the button is clicked in the MailChimp campaign the calendar invite for the event is sent and the RSVP’s requested and are collected back to the AWS API gateway.
Anytime your customer changes the data on their calendar client that updated data is send back to the Calendar Invite Server.
Instant RSVP Workflow: Native UI Engagement
Users fundamentally trust their native calendar interface—whether it’s Outlook, Google, or Apple Calendar—more than a third-party registration website.
By delivering an immediate choice of “Yes,” “No,” or “Maybe” within their email inbox and onto calendar client, you are meeting the customer where they are most organized, drastically increasing the likelihood of a confirmed RSVP.
Centralized Data Collection via the Dashboard
Traditional email analytics tell you who opened a message or clicked a link, but they offer zero insight into a Calendar Invite Reporting center.
By synchronizing responses back to a centralized calendar invite dashboard, you gain a high-fidelity view of your audience’s plans.
Crucially, this system captures “No” and “Maybe” responses, which are goldmines for retargeting.
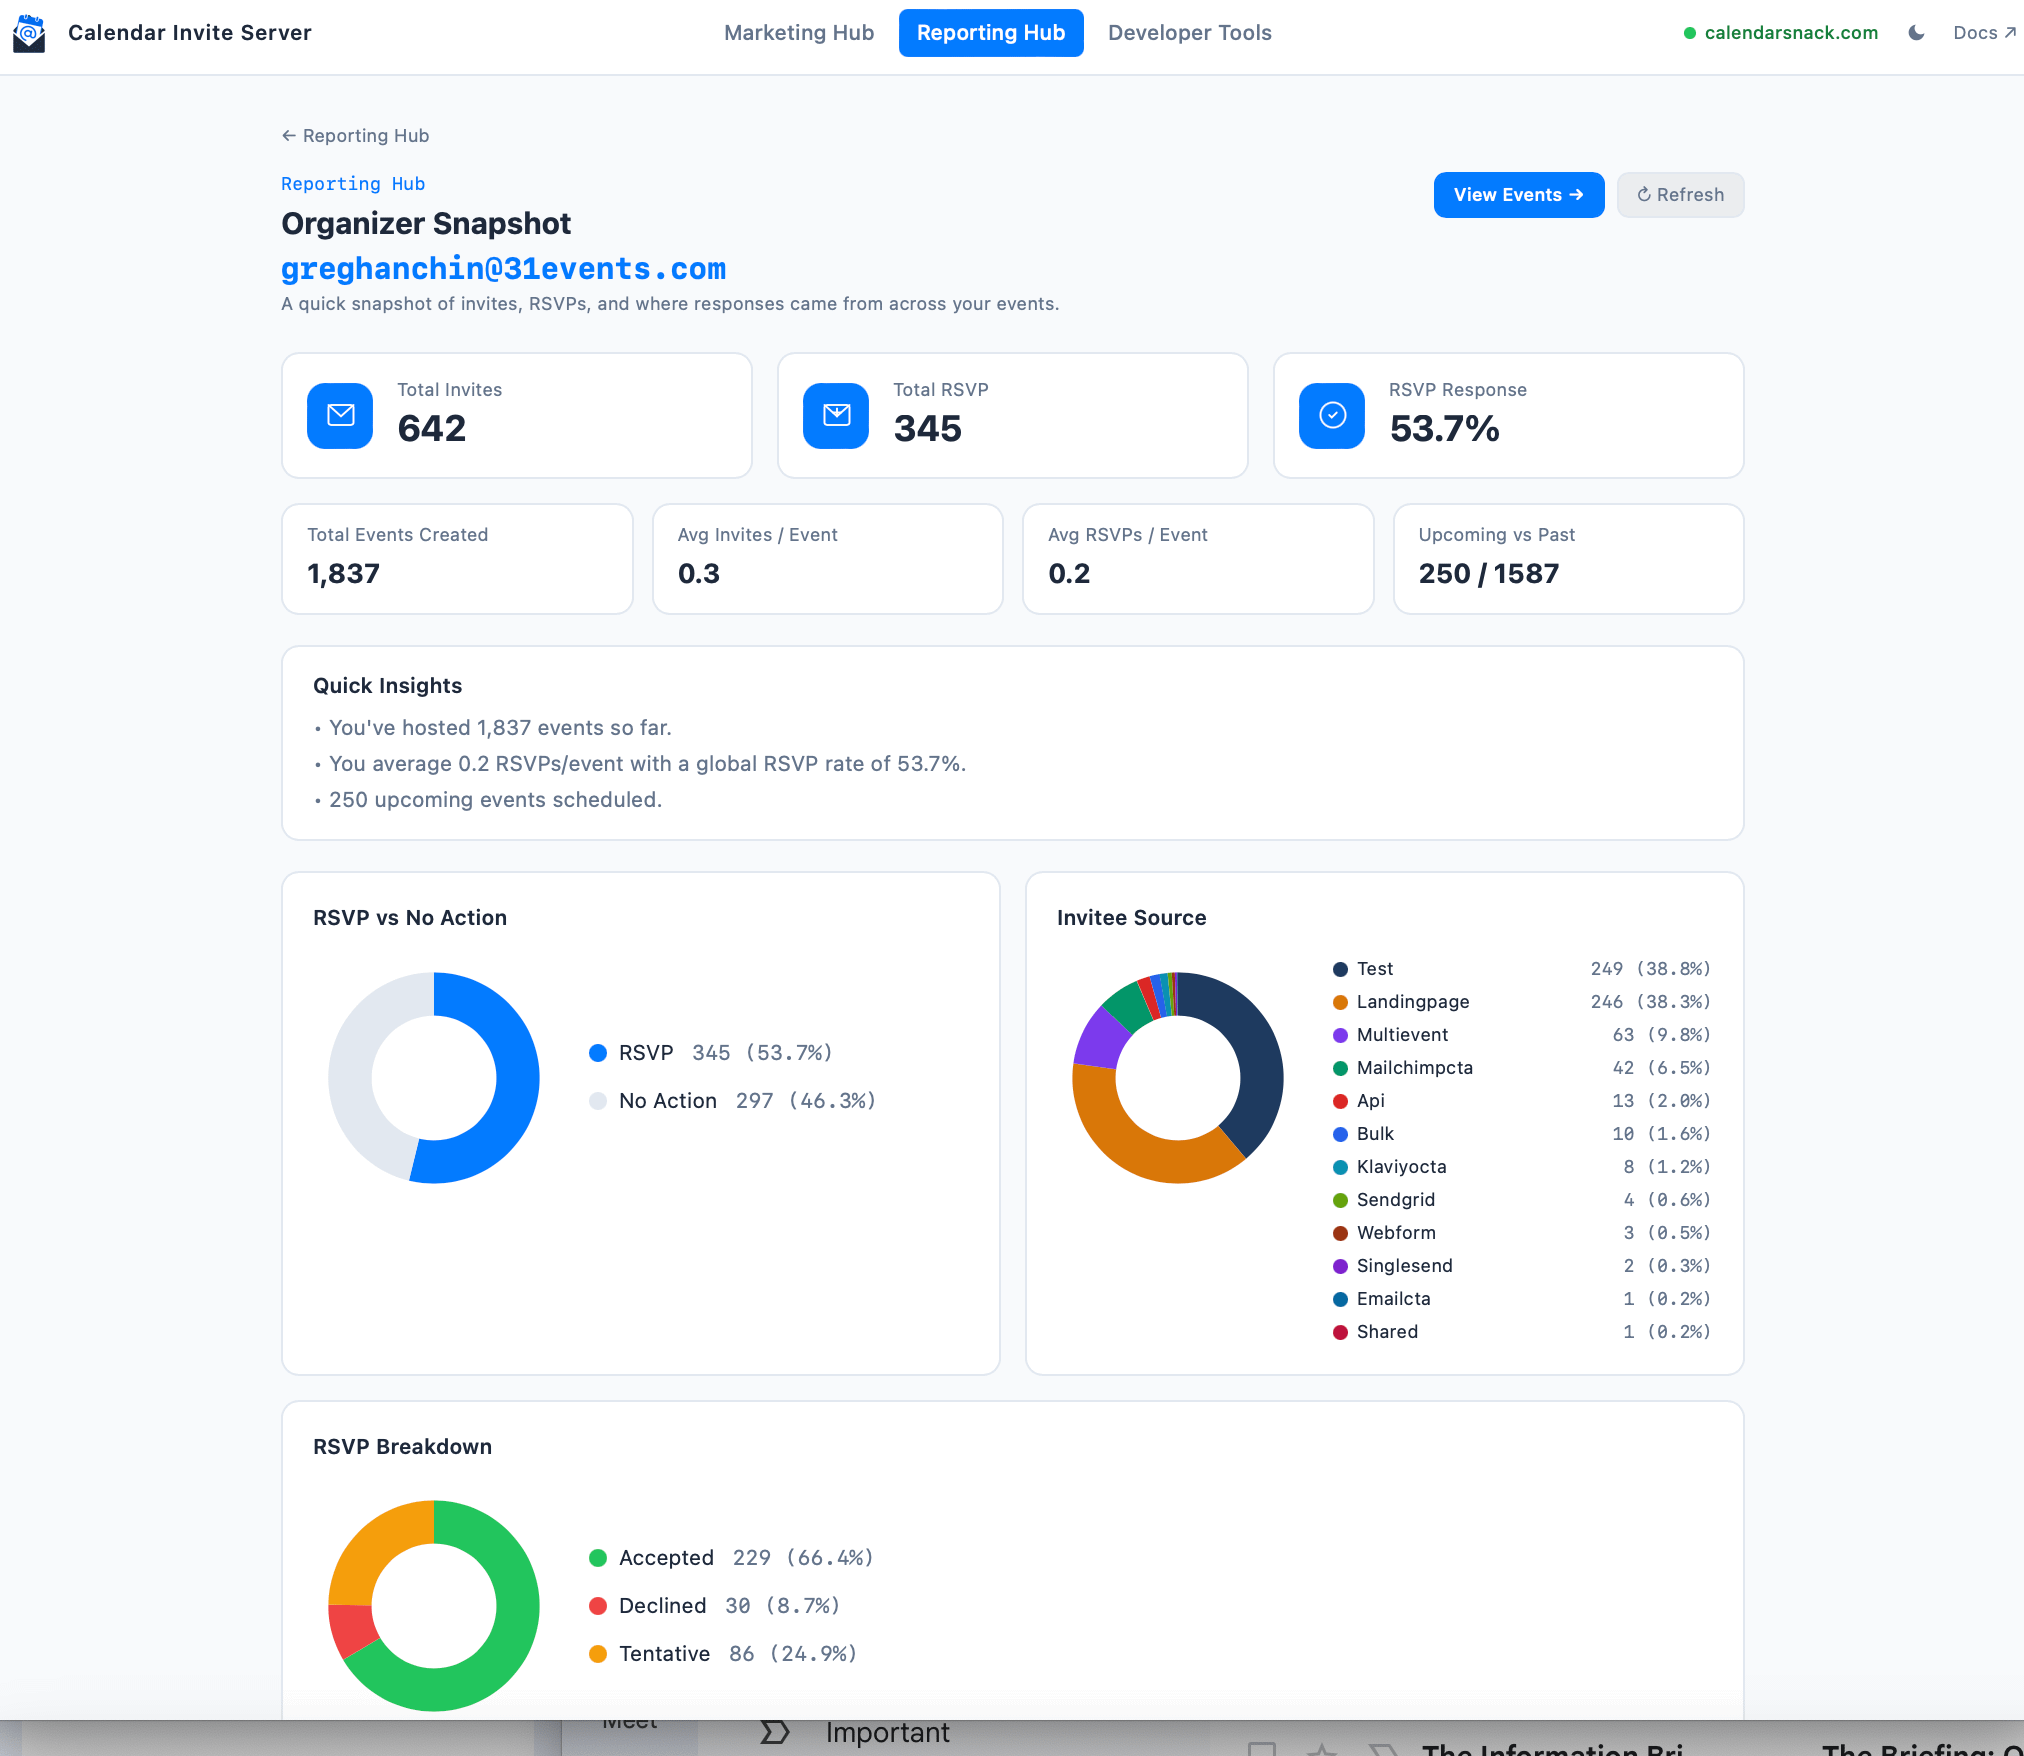
With this dashboard, a “No” or “Maybe” provides a clear signal of interest that allows for sophisticated follow-up sequences.
You move beyond “opens” to “confirmed attendance” metrics, allowing for accurate forecasting and higher ROI.
The Embed Codes in 2 minutes
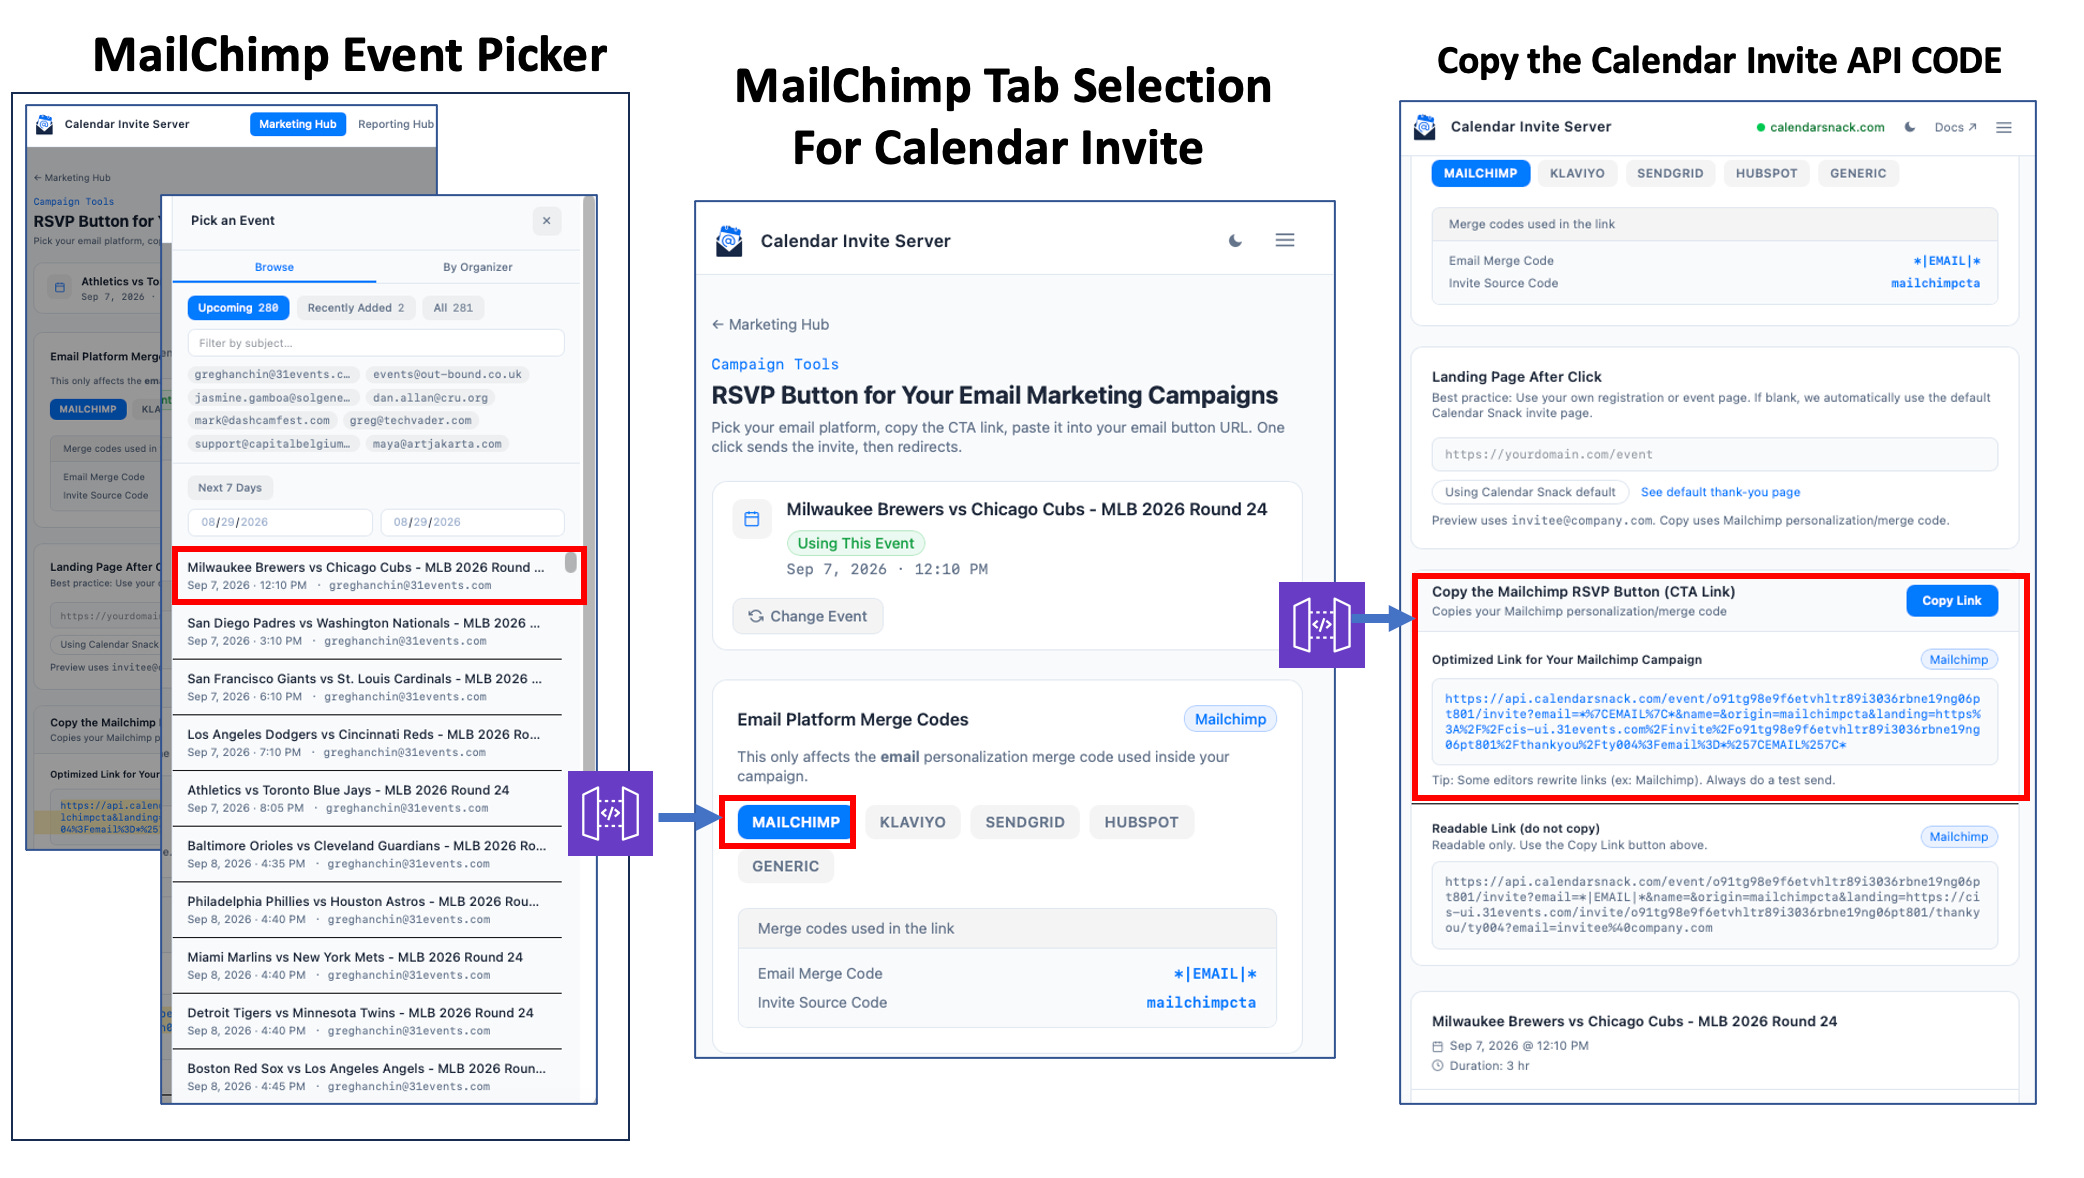
The workflow is setup to generate the MailChimp codes in 6o seconds.
Select the Event in the picker, select MailChimp, copy the code and insert into the MailChimp Call to Action Button.
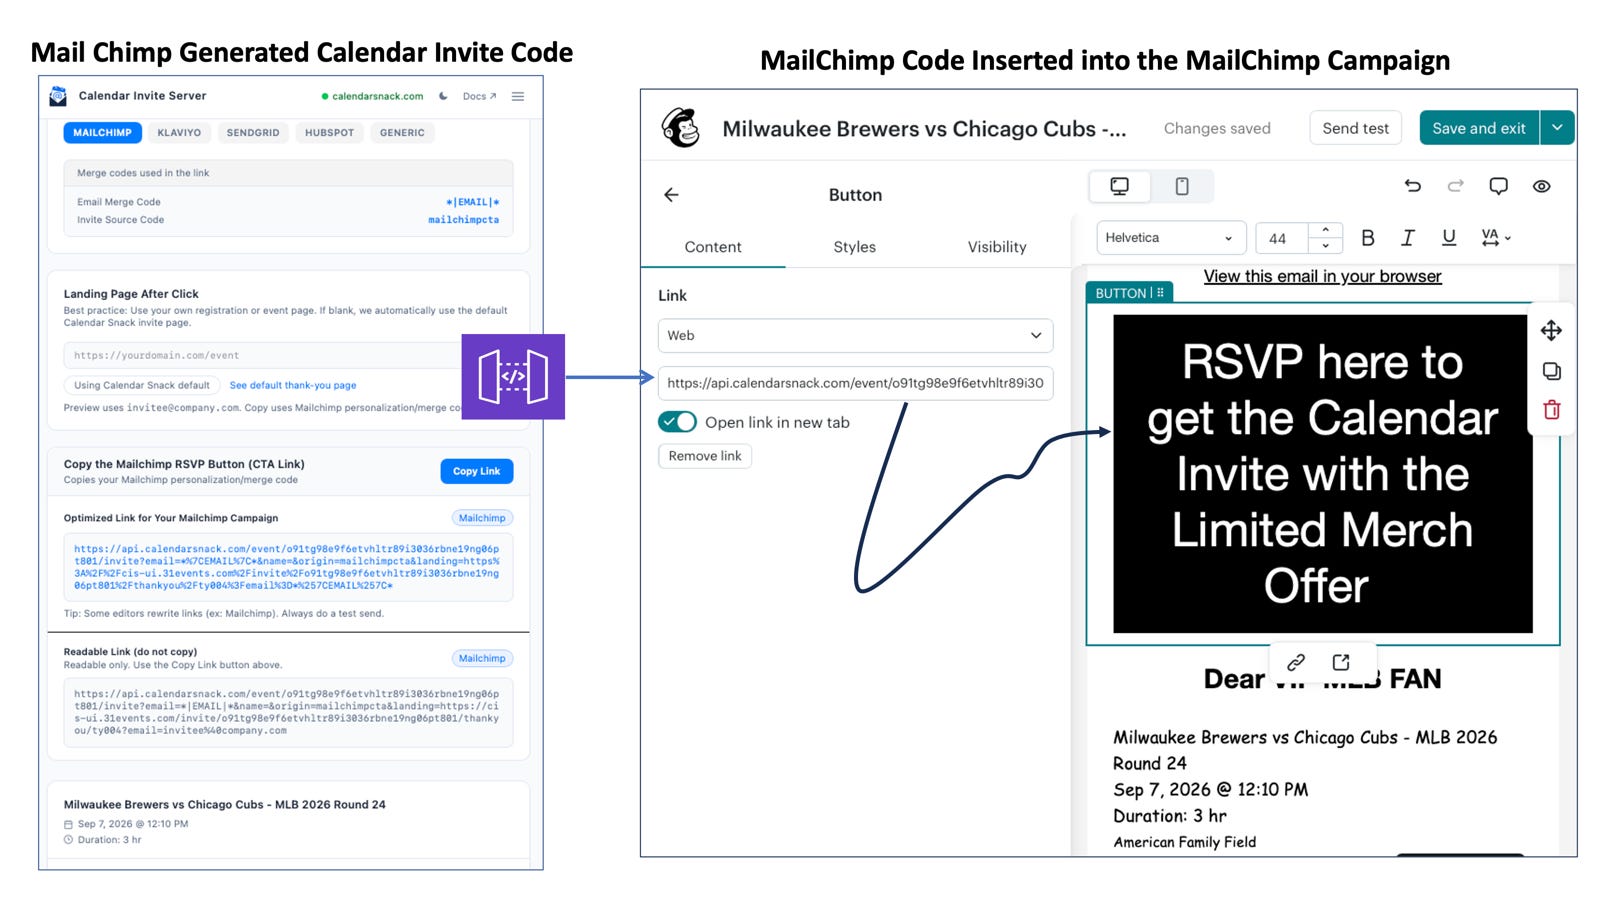
Test the campaign and then schedule the MailChimp Sending to your email list.
When the MailChimp CTA is Clicked there is an option to use your own Landing Page or use the stock one that ships with the Calendar Invite Code that specific event.
How is data sent to the Calendar Invite Server?
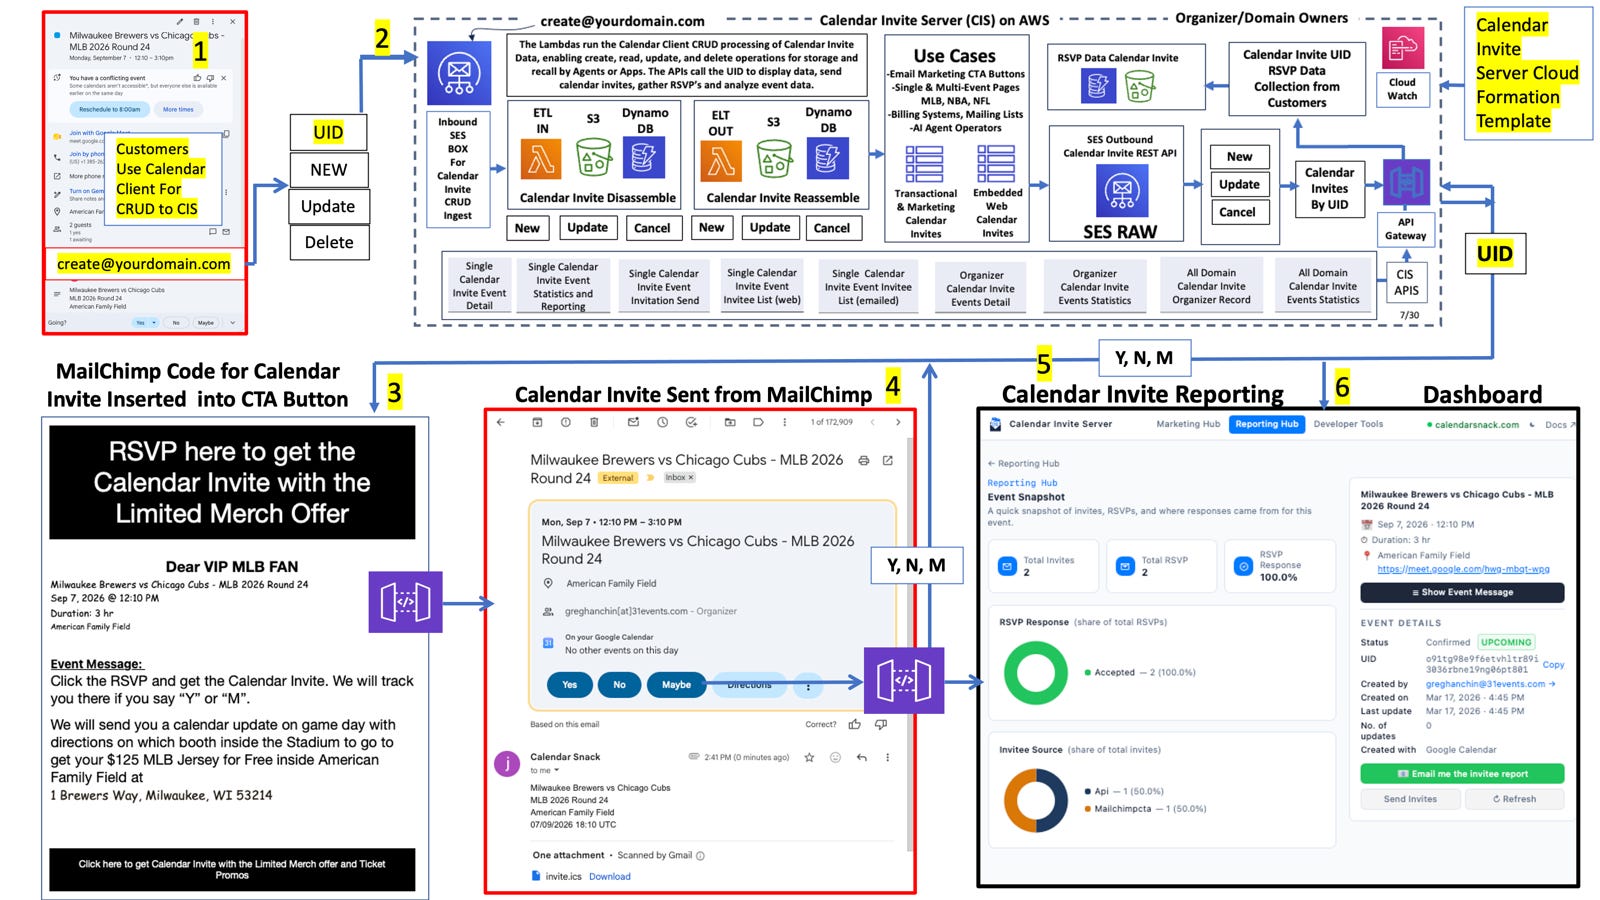
Step one is your customers use their Calendar Clients to send events to your email box you setup in your AWS Account. We actually setup this up when you install the Calendar Invite Server.
The installation script uses your AWS SES domain and setups a Email Box. The email box is staged as create@yourdomain.com. This box is the processing center for CREATE, READ, UPDATE and DELETE of any data for that organizers account.
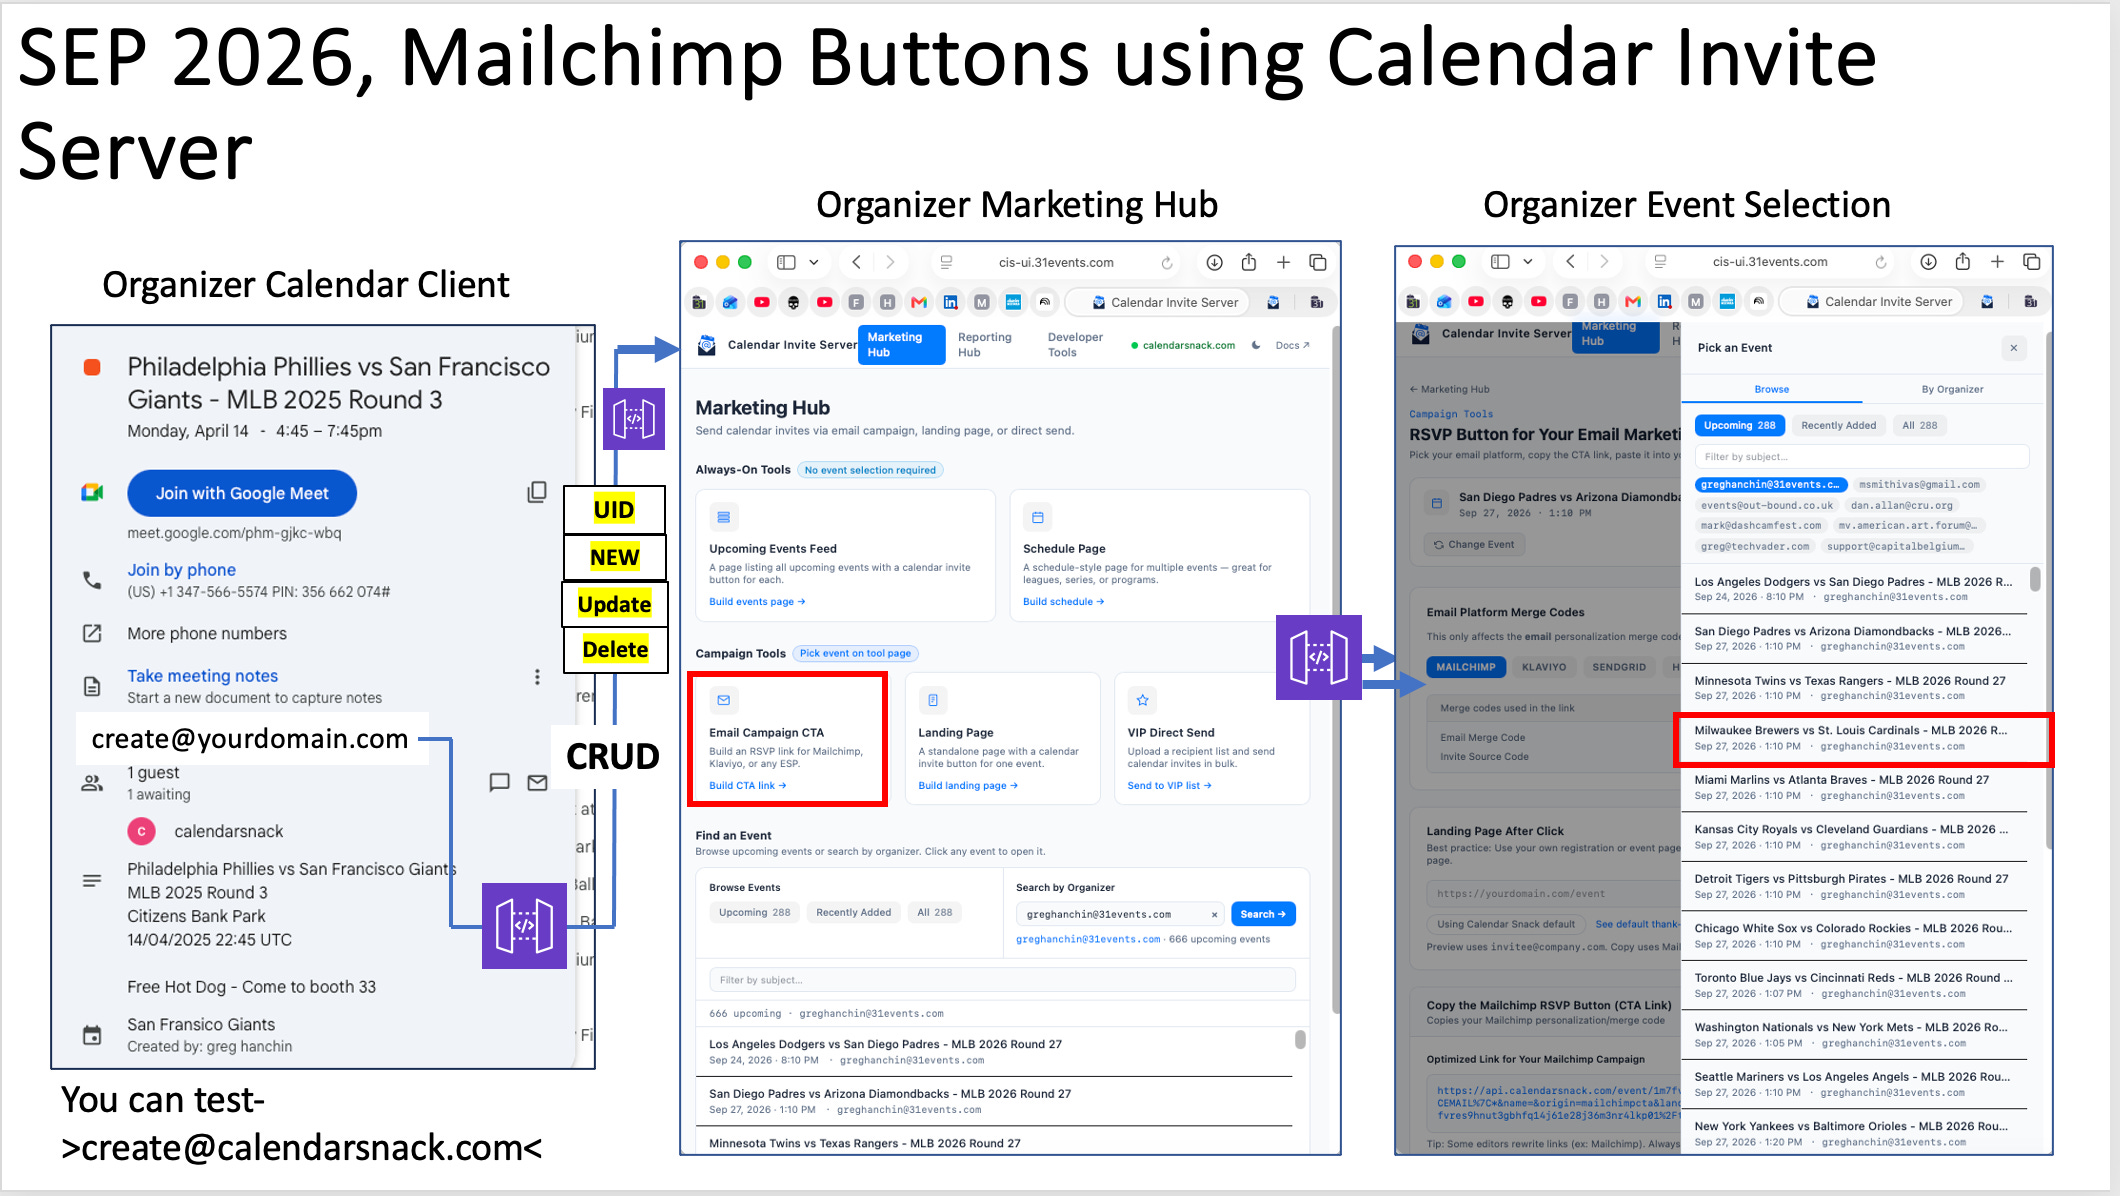
This email box runs the headless pipeline for customer data to be generated in the Data Base, Display APIs and the REST API that sends calendar invites and gathers RSVP Data on a per Calendar Invite Basis.
Example Campaign from a SEND GRID Embedded Email Campaign
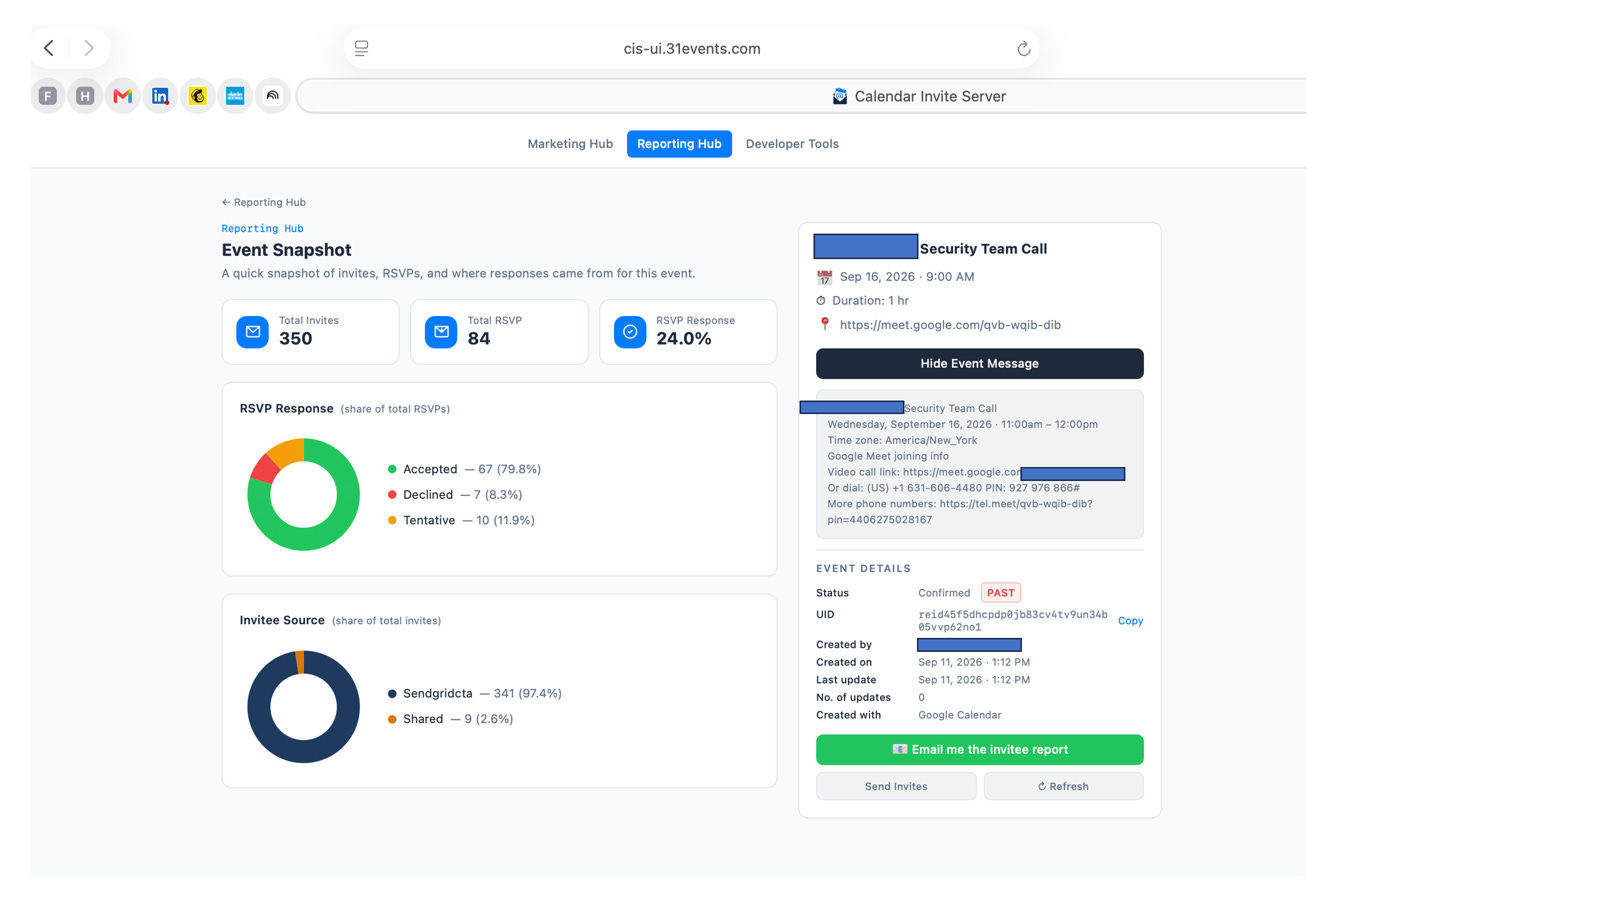
This campaign proves this is a better process for RSVP date collection. 350 Calendar Invites were sent via the CTA BUTTON in the SendGrid Template, 84 People have responded YES with a 24% Response Rate to the WEBINAR.
The 85 RSVP’s are actual customers that have accepted using their calendar clients.
For more on how it all works see.
Demo APP
Calendar Invite Server